Midjourney vs Stable Diffusion Comparisons: Which AI Art Tool Is Best for You? - Graphics Designing Classes in Raipur.

Midjourney vs Stable Diffusion Comparisons: Which AI Art Tool Is Best for You?

Midjourney vs Stable Diffusion Comparisons: Which AI Art Tool Is Best for You? - Graphics Designing Classes in Raipur.

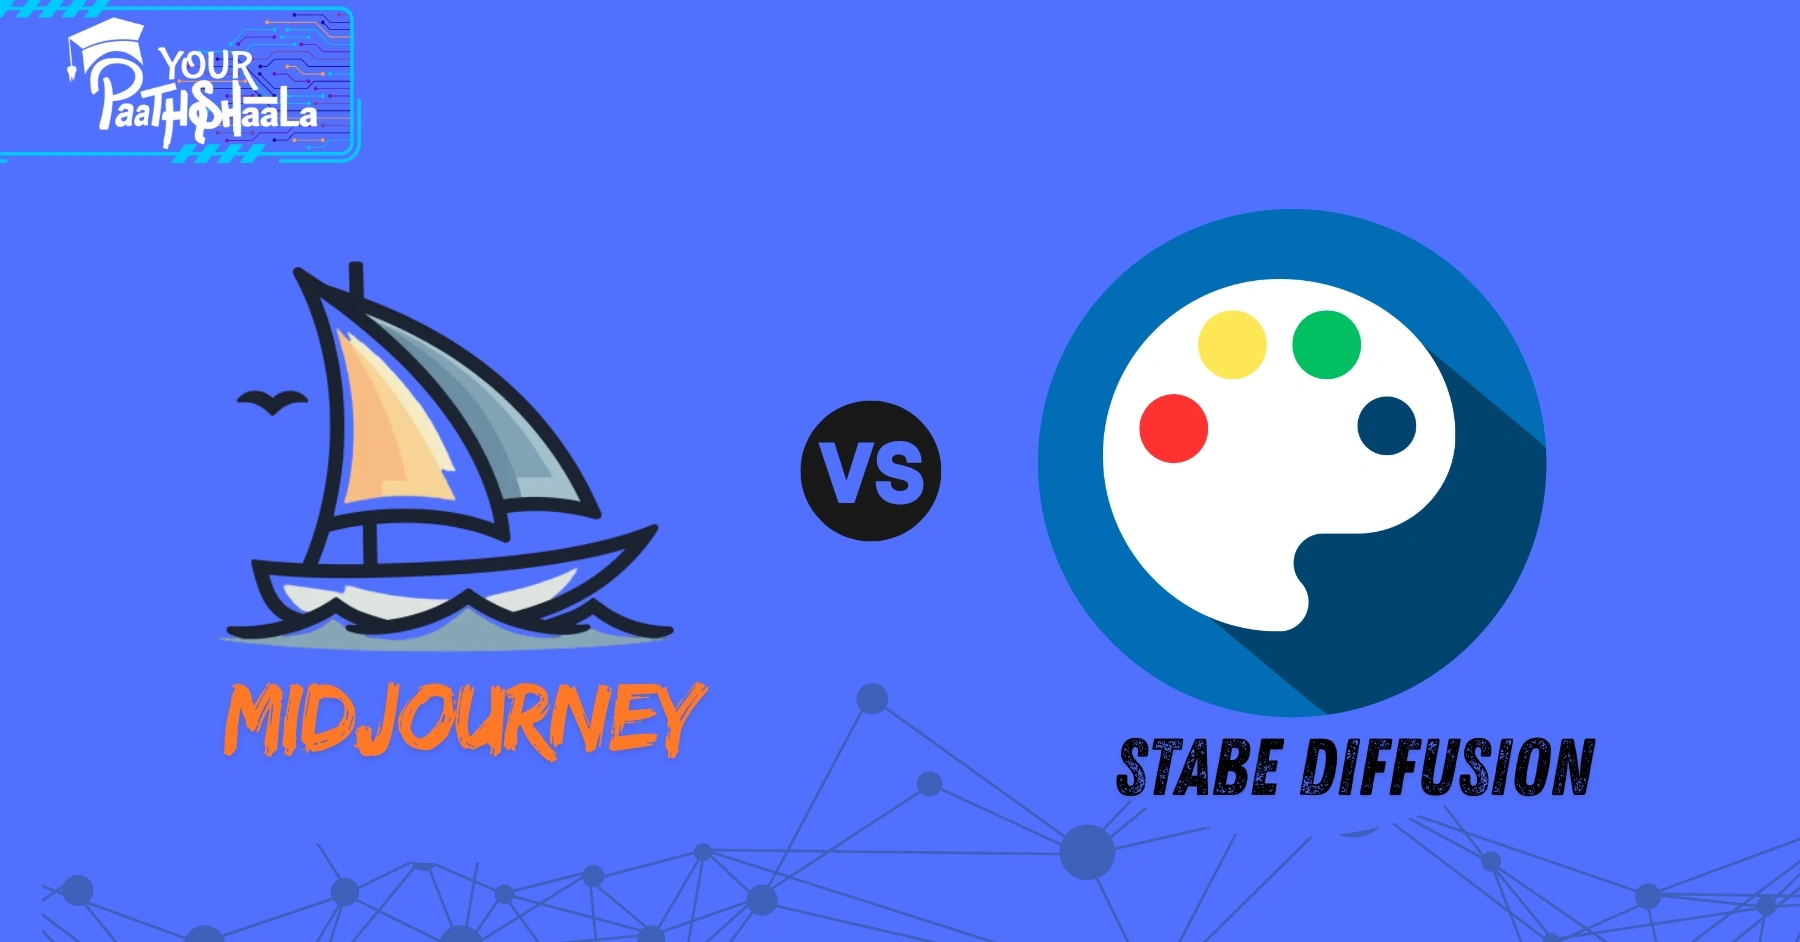
AI image generators are transforming graphic design, and two tools lead the pack: Midjourney and Stable Diffusion. Whether you’re creating stunning social media graphics, logos, or concept art, choosing the right tool can make or break your workflow. Midjourney vs Stable Diffusion comparisons often highlight their unique strengths—Midjourney’s ease of use and polished visuals versus Stable Diffusion’s flexibility and open-source nature. This beginner-friendly guide breaks down their differences in accessibility, customization, cost, and output quality to help you decide which fits your creative needs. Let’s dive into Midjourney vs Stable Diffusion comparisons and find your perfect AI art tool!


What Are Midjourney and Stable Diffusion?

Midjourney and Stable Diffusion are AI-powered text-to-image generators that create visuals from text prompts. They use advanced machine learning (diffusion models) to turn descriptions like “futuristic city at sunset” into detailed images. Here’s a quick overview:

  • Midjourney: A proprietary tool accessed via Discord or its web app, known for high-quality, artistic images with minimal effort. It’s subscription-based and user-friendly.
  • Stable Diffusion: An open-source model available on platforms like DreamStudio or locally on your PC. It offers extensive customization but requires more technical know-how.

This guide will compare these tools to help you choose the best for your graphic design workflow.


Why Midjourney vs Stable Diffusion Comparisons Matter

Understanding Midjourney vs Stable Diffusion comparisons is key to picking the right tool for your projects. Each excels in different areas:

  • Ease of Use: Midjourney is beginner-friendly; Stable Diffusion needs setup and learning.
  • Customization: Stable Diffusion offers more control; Midjourney keeps it simple.
  • Cost: Stable Diffusion has free options; Midjourney requires a paid subscription.
  • Output Quality: Midjourney delivers polished results; Stable Diffusion matches with tweaking.

Whether you’re a beginner creating social media posts or a pro designing detailed artwork, these comparisons will guide your choice.


Midjourney vs Stable Diffusion Comparisons: Key Factors

Let’s break down Midjourney vs Stable Diffusion comparisons across four key areas: accessibility, customization, cost, and output quality.

1. Accessibility: How Easy Is It to Get Started?

Midjourney

  • Platform: Accessed via Discord or a new web app (as of 2025), requiring an internet connection.
  • Setup: Sign up for Discord, join the Midjourney server, and use the “/imagine” command to generate images. No local installation needed.
  • Ease of Use: Intuitive for beginners, with a simple interface and community support on Discord. Ideal for those who want quick results without technical setup.
  • Drawback: Requires an internet connection and Discord familiarity, which may feel clunky for non-Discord users.

Stable Diffusion

  • Platform: Available online (e.g., DreamStudio, Hugging Face) or locally on a PC with at least 4GB VRAM. Can be used offline with local setup.
  • Setup: Online versions are simple, but local installation requires technical steps like configuring Python and a GPU.
  • Ease of Use: Steeper learning curve, especially for local use. User-friendly interfaces like DreamStudio make it accessible, but advanced features need learning.
  • Drawback: Setup complexity can deter beginners, but open-source access offers flexibility.

Verdict: Midjourney wins for ease of access and quick setup, especially for beginners. Stable Diffusion is better for those comfortable with technical setups or needing offline use.

2. Customization: How Much Control Do You Have?

Midjourney

  • Options: Limited customization, including aspect ratios, model versions (v1-v6), and stylization parameters like “–niji” for anime styles.
  • Features: Supports outpainting, inpainting, and blending images, but lacks advanced editing like Stable Diffusion’s inpainting precision.
  • Style Consistency: New 2024 features (sref, cref parameters) improve character and style consistency for projects like comics.
  • Drawback: Less control over fine details, making it less ideal for highly specific designs.

Stable Diffusion

  • Options: Extensive customization, including image size, prompt strength, seed values, sampling methods, and thousands of community models for unique styles.
  • Features: Advanced editing like inpainting (editing parts of an image), outpainting (extending images), and negative prompts to exclude unwanted elements.
  • Style Consistency: Tools like Neural Frames allow training custom models for consistent styles, ideal for sequential art.
  • Drawback: Requires prompt engineering and technical knowledge to achieve optimal results.

Verdict: Stable Diffusion wins for customization, offering unmatched control for detailed projects. Midjourney is simpler but less flexible.

3. Cost: What’s the Price Tag?

Midjourney

  • Pricing: Subscription-based, starting at $10/month for ~3.3 GPU hours, up to $96/month for 60 GPU hours (annual plans offer discounts). No free tier beyond a limited trial.
  • Trial: Offers a short trial (~25 minutes of generation time), but full access requires payment.
  • Value: Predictable costs with no hardware investment, ideal for users without powerful PCs.
  • Drawback: Ongoing subscription costs add up, especially for heavy users.

Stable Diffusion

  • Pricing: Free for local use or basic online versions (e.g., 10 images/day). Paid plans (e.g., DreamStudio) start at $14/month for 4,000 images.
  • Trial: Free access for non-commercial use via local installation or limited online trials.
  • Value: Cost-effective for users with compatible hardware; cloud options are affordable for casual users.
  • Drawback: Local setup may require a powerful GPU, adding hardware costs.

Verdict: Stable Diffusion wins for cost, with free options and affordable plans. Midjourney’s subscriptions are pricier but include server access.

4. Output Quality: Which Produces Better Images?

Midjourney

  • Style: Known for high-contrast, detailed, and realistic illustrations with a polished, artistic flair. Excels in fantasy, sci-fi, and cinematic styles.
  • Prompt Accuracy: Matches prompts well with minimal tweaking, producing vibrant, professional images.
  • Examples: A prompt like “impressionist painting of a forest” yields detailed, painterly results with rich colors.
  • Drawback: Can add modern elements (e.g., makeup in historical scenes) that feel out of place.

Stable Diffusion

  • Style: Offers diverse styles, from photorealistic to abstract, depending on the model used. Requires prompt tuning for optimal results.
  • Prompt Accuracy: Matches prompts with tweaking; excels in ultra-realistic or custom styles with tools like LoRA or ControlNet.
  • Examples: The same “impressionist painting” prompt may need specific models (e.g., Stable Diffusion Ultra) to rival Midjourney’s polish.
  • Drawback: Default outputs may lack Midjourney’s flair without fine-tuning.

Verdict: Midjourney wins for out-of-the-box quality; Stable Diffusion matches or exceeds it with expertise and custom models.


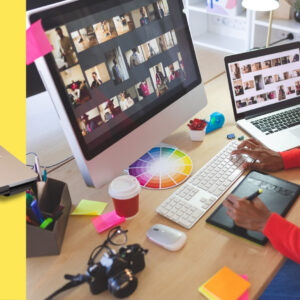
Step-by-Step Workflow: Creating a Social Media Graphic

Here’s a beginner-friendly workflow comparing Midjourney and Stable Diffusion for a social media graphic (e.g., Instagram post for a coffee shop).

Midjourney Workflow

  1. Join Midjourney: Sign up for Discord and join the Midjourney server.
  2. Enter Prompt: Type “/imagine vintage coffee shop poster, warm tones, cozy vibe –ar 1:1” in a private Discord channel.
  3. Generate Images: Receive four images in ~1 minute. Select the best and upscale using “–v 6” for higher quality.
  4. Edit: Use Canva to add text like “Grand Opening!” and adjust colors.
  5. Export: Save as PNG for Instagram.

Time: ~10 minutes
Pros: Fast, polished results with minimal effort.
Cons: Limited editing options within Midjourney.

Stable Diffusion Workflow

  1. Access Platform: Use DreamStudio or install locally via AUTOMATIC1111.
  2. Enter Prompt: Input “vintage coffee shop poster, warm tones, cozy vibe, high detail” with settings (e.g., 512×512, 30 steps).
  3. Generate Images: Get two images (DreamStudio) or more (local). Tweak with negative prompts (e.g., “avoid blurry text”).
  4. Edit: Use inpainting to refine details or Canva for text overlays.
  5. Export: Save as PNG for Instagram.

Time: ~15-20 minutes
Pros: High control over details and styles.
Cons: Requires more setup and prompt tweaking.

Verdict: Midjourney is faster for beginners; Stable Diffusion offers more control for custom designs.


Midjourney vs Stable Diffusion for Different Use Cases

1. Social Media Graphics

  • Midjourney: Best for quick, eye-catching posts with minimal effort. Ideal for Instagram or TikTok.
  • Stable Diffusion: Great for tailored visuals with specific branding needs, like product ads.

2. Concept Art

  • Midjourney: Excels in fantasy/sci-fi environments with cinematic quality.
  • Stable Diffusion: Better for ultra-realistic or niche styles with custom models.

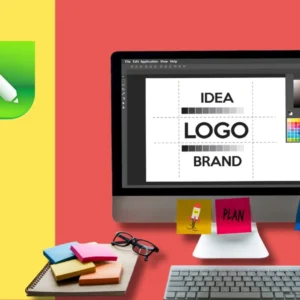
3. Branding and Logos

  • Midjourney: Good for artistic logo concepts but limited for precise edits.
  • Stable Diffusion: Ideal for iterative logo design with inpainting/outpainting.

Common Mistakes to Avoid

  • Midjourney: Vague prompts lead to inconsistent results. Be specific, e.g., “cyberpunk city, neon lights, night” instead of “futuristic city.”
  • Stable Diffusion: Skipping model selection or negative prompts can result in low-quality outputs. Use community models for better results.
  • Both: Ignoring platform-specific guidelines (e.g., Midjourney’s censorship on explicit content) can limit usability.

Tools and Resources

  • Midjourney: Discord, Midjourney web app, Canva for post-editing.
  • Stable Diffusion: DreamStudio, AUTOMATIC1111, Hugging Face, Neural Frames for style consistency.
  • Learning: YouTube channels like Video Copilot, Reddit’s r/StableDiffusion, or PAACADEMY’s AI workshops.

Why Midjourney vs Stable Diffusion Comparisons Matter in 2025

As of July 2025, AI art tools are central to graphic design. Midjourney’s web app and V6 model make it more accessible, while Stable Diffusion’s open-source community drives innovation with tools like Stable Diffusion 3. X posts note Stable Diffusion’s edge in fine details and pose control, but Midjourney’s polished visuals remain a favorite for quick results. With AI design markets growing (valued at $150.2 billion in 2023), choosing the right tool is key.


Conclusion

Midjourney vs Stable Diffusion comparisons reveal two powerful AI art tools with distinct strengths. Midjourney shines for beginners seeking fast, high-quality visuals with minimal effort, perfect for social media or artistic projects. Stable Diffusion excels for advanced users needing customization and flexibility, ideal for detailed designs or branding. Your choice depends on your skill level, budget, and project needs. Try Midjourney’s trial for quick results or Stable Diffusion’s free version to experiment. Start creating today and see which tool sparks your creativity! To learn more about graphic designing practically join our institute YourPaathshaala in raipur or contact us at 8305209520 for more information.

What is AI Graphic Design Workflows for beginners? - Graphics Designing Course in Raipur.

AI Graphic Design Workflows and Tutorials: Streamline Your Creative Process

What is AI Graphic Design Workflows for beginners? - Graphics Designing Course in Raipur.

Artificial Intelligence (AI) is revolutionizing graphic design, making it faster and easier to create stunning visuals. From generating logos to automating repetitive tasks, AI graphic design workflows and tutorials help beginners and pros alike streamline their creative process. Whether you’re designing social media posts, branding materials, or motion graphics, AI tools like Canva, Midjourney, and Adobe Firefly can save time and spark inspiration. This beginner-friendly guide explores how to integrate AI into your design workflow and provides simple tutorials to get you started. Let’s dive into AI graphic design workflows and tutorials to elevate your creative game!


What Are AI Graphic Design Workflows and Tutorials?

AI graphic design workflows are step-by-step processes that use AI tools to create, edit, or enhance visual content. These workflows automate tasks like background removal, color palette generation, or layout design, allowing designers to focus on creativity. Tutorials are guides that teach you how to use these AI tools effectively, often with practical examples or prompts. For instance, you might use Midjourney to generate a logo from a text prompt or Canva’s AI to resize designs for social media. AI graphic design workflows and tutorials make professional-quality design accessible, even if you’re new to the field.

This guide will walk you through workflows and tutorials to master AI-driven design.


Why AI Graphic Design Workflows and Tutorials Matter

AI is transforming graphic design by saving time and boosting creativity. Here’s why AI graphic design workflows and tutorials are essential:

  • Saves Time: Automate repetitive tasks like resizing images or removing backgrounds.
  • Boosts Creativity: AI suggests design ideas, color schemes, or layouts to spark inspiration.
  • Accessible for All: Beginners can create professional designs without years of experience.
  • Improves Efficiency: Streamline workflows for faster project delivery.
  • Enhances Personalization: AI analyzes data to create tailored designs for specific audiences.

Whether you’re a freelancer, marketer, or small business owner, AI graphic design workflows and tutorials help you work smarter.


The Building Blocks of AI Graphic Design Workflows

To create effective AI-driven designs, you need to understand three key components: automation, ideation, and collaboration. Let’s break them down.

1. Automation: Speed Up Repetitive Tasks

AI excels at handling time-consuming tasks, freeing you to focus on creative work. Here’s how automation works in AI graphic design workflows:

  • Background Removal: Tools like Remove.bg or Recraft remove backgrounds in one click.
  • Image Upscaling: Let’s Enhance boosts low-res images without losing quality.
  • Layout Adjustments: Adobe Sensei auto-reframes designs for different platforms.
  • Font Pairing: Fontjoy suggests font combinations for headers and body text.

Pro Tip: Use automation for repetitive tasks to save hours on each project.

2. Ideation: Spark Creative Ideas

AI tools generate design ideas to overcome creative blocks. Here’s how they help:

  • Text-to-Image: Midjourney and DALL-E create visuals from text prompts, like “vintage logo for a coffee shop.”
  • Color Palettes: Khroma generates personalized color schemes based on your preferences.
  • Templates: Canva’s AI suggests layouts for social media or flyers.
  • Concept Exploration: Use ChatGPT to brainstorm design ideas or campaign themes.

Pro Tip: Experiment with AI prompts to discover unique design styles.

3. Collaboration: Streamline Teamwork

AI enhances team workflows by improving feedback and consistency. Here’s how:

  • Feedback Tools: Artwork Flow allows real-time comments and annotations.
  • Brand Consistency: Recraft’s AI ensures designs align with brand styles.
  • Project Management: ClickUp automates design project tracking and feedback.
  • Real-Time Edits: Tools like Kittl enable instant team feedback.

Pro Tip: Use AI collaboration tools to keep remote teams aligned.


Step-by-Step AI Graphic Design Workflow

Here’s a simple workflow to create a social media post using AI tools, perfect for beginners.

Step 1: Plan Your Design

Define your project’s goal and audience. Ask yourself:

  • What’s the Purpose? E.g., promote a sale or share a tip.
  • Who’s the Audience? E.g., young adults for Instagram or professionals for LinkedIn.
  • What’s the Style? E.g., bold and colorful or clean and minimal.

Write a brief, like: “Create a vibrant Instagram post for a summer sale.”

Step 2: Generate Visuals with AI

Use AI tools to create or enhance visuals:

  • Image Generation: In Midjourney, enter a prompt like “bright summer sale poster, tropical vibe” to generate an image.
  • Background Removal: Upload a product photo to Remove.bg to isolate the subject.
  • Upscaling: Use Let’s Enhance to improve image quality for print or digital.

Pro Tip: Save generated images to reuse across projects.

Step 3: Design with AI Tools

Choose a design platform to create your layout:

  • Canva: Use Canva’s AI to select a template and customize with your image and text.
  • Adobe Express: Apply AI-powered text effects or auto-resize for Instagram.
  • Figma: Use AI plugins like smart selection for collaborative design.

Add text, colors, and fonts that match your brand.

Step 4: Add Motion or Text

Enhance your design with dynamic elements:

  • Motion Text: Use Adobe After Effects or CapCut to add animated text overlays.
  • Lower Thirds: Create name graphics in Canva for a professional look.
  • Sync to Audio: Time text animations to music beats using CapCut’s beat detection.

Pro Tip: Keep animations short (1-2 seconds) for impact.

Step 5: Review and Export

Polish and share your design:

  • Get Feedback: Share with your team via Artwork Flow or ClickUp for comments.
  • Check Quality: Ensure text is readable and images are high-res on mobile.
  • Export: Save as PNG or MP4 in 1080p for social media platforms.

Pro Tip: Test your design on a phone to confirm it looks great.


Beginner-Friendly AI Graphic Design Tutorials

Here are three simple tutorials to get you started with AI graphic design workflows and tutorials.

Tutorial 1: Create a Logo with Midjourney

Goal: Design a logo for a fictional coffee shop.

  1. Open Midjourney: Access via Discord or its platform.
  2. Enter a Prompt: Type “/imagine vintage coffee shop logo, minimalist, brown and cream tones –ar 1:1” and generate.
  3. Refine Results: Select the best logo and use “Remix Mode” to tweak details, like “add a coffee cup icon.”
  4. Vectorize: Upload to Recraft’s vectorizer for a scalable SVG file.
  5. Export: Download and use in Canva for further tweaks.

Time: 15 minutes
Tools: Midjourney, Recraft, Canva
Pro Tip: Experiment with prompts to get unique logo styles.

Tutorial 2: Design a Social Media Post with Canva AI

Goal: Create an Instagram post for a product launch.

  1. Open Canva: Choose a blank Instagram post template (1080×1080).
  2. Use AI Generator: Enter “modern product launch graphic, tech vibe” in Canva’s AI image generator.
  3. Customize: Add your product image (cleaned with Remove.bg) and text like “New Release Today!”
  4. Add Animation: Apply a “fade-in” text animation from Canva’s animate tool.
  5. Export: Save as PNG or MP4 and post to Instagram.

Time: 10 minutes
Tools: Canva, Remove.bg
Pro Tip: Use Canva’s Magic Resize to adapt for other platforms.

Tutorial 3: Create a Lower Third with Adobe Express

Goal: Add a professional lower third to a video.

  1. Open Adobe Express: Start a new video project.
  2. Add Text: Create a lower third with text like “Jane Doe, Designer” using a bold font.
  3. Apply AI Effects: Use Adobe Firefly for text effects, like a neon glow.
  4. Animate: Add a “slide-in” animation to the text.
  5. Export: Save as MP4 and import into your video editor.

Time: 20 minutes
Tools: Adobe Express
Pro Tip: Keep lower thirds on screen for 3-5 seconds for readability.


AI Graphic Design Workflows for Different Needs

Tailor your workflow to your project type:

1. Social Media Graphics

  • Tools: Canva, Adobe Express, Midjourney
  • Workflow: Generate images with Midjourney, clean up with Remove.bg, and design in Canva with AI templates.
  • Tips: Use vibrant colors and short text animations for engagement.

2. Branding and Logos

  • Tools: Looka, Recraft, Adobe Sensei
  • Workflow: Generate logo concepts with Looka, vectorize with Recraft, and refine in Adobe Illustrator.
  • Tips: Ensure logo variations align with brand colors.

3. Motion Graphics

  • Tools: Adobe After Effects, CapCut
  • Workflow: Create static designs in Canva, then animate text in After Effects or CapCut.
  • Tips: Sync animations to music beats for impact.

Common AI Graphic Design Workflow Mistakes to Avoid

Steer clear of these pitfalls:

  • Vague Prompts: Unclear prompts in Midjourney or DALL-E lead to poor results. Be specific, e.g., “modern logo, blue tones, tech theme.”
  • Over-Reliance on AI: AI can’t replace human creativity. Use it as a starting point, not the final product.
  • Ignoring Ethics: Check for copyright issues with AI-generated content. Use tools with clear licensing, like Adobe Firefly.
  • Poor Integration: Ensure AI tools work with your existing software (e.g., Figma plugins).

Tools for AI Graphic Design Workflows and Tutorials

Start with these beginner-friendly tools:

  • Canva: AI-powered templates and image generation. Free tier available.
  • Midjourney: Text-to-image generator for unique visuals. Subscription-based.
  • Remove.bg: One-click background removal. Free and paid plans.
  • Adobe Express: AI text effects and resizing. Part of Creative Cloud.
  • Recraft: Vectorization and brand consistency tools. Free and paid plans.

Learning More About AI Graphic Design Workflows and Tutorials

Level up your skills with these resources:

  • Courses: Designlab’s AI for Visual Design or ELVTR’s AI-Aided Graphic Design (covers Midjourney and Figma).
  • YouTube Channels: Watch tutorials on channels like Video Copilot or Will Paterson for AI design tips.
  • Communities: Join Reddit’s r/GraphicDesign or X for AI workflow ideas.
  • Practice: Create one AI-assisted design weekly to test new tools.

Why AI Graphic Design Workflows and Tutorials Rock in 2025

As of July 2025, AI is a game-changer for graphic design. Tools like Canva and Midjourney make professional design accessible, while Adobe Sensei automates complex tasks. A 2024 survey found 98% of U.S. graphic designers use AI daily, citing time savings and efficiency. With AI tools evolving, tutorials on platforms like Designlab and X posts from creators like @BrettFromDJ help beginners stay ahead. AI graphic design workflows and tutorials are your ticket to faster, more creative designs.


Conclusion

AI graphic design workflows and tutorials empower anyone to create stunning visuals with ease. By automating repetitive tasks, sparking ideas, and streamlining collaboration, AI tools like Canva, Midjourney, and Adobe Express make design accessible and efficient. Start with the tutorials in this guide, experiment with prompts, and integrate AI into your workflow. Whether you’re crafting social media posts or logos, AI graphic design workflows and tutorials will help you save time and unleash your creativity.

Ready to design like a pro? Try a tutorial today and transform your workflow! To learn more about graphic designing practically join our institute YourPaathshaala in raipur or contact us at 8305209520 for more information.

Motion Text & Lower Thirds: Add Professional Flair to Your Videos - Graphics Designing Course in Raipur.

Motion Text & Lower Thirds: Add Professional Flair to Your Videos

Motion Text & Lower Thirds: Add Professional Flair to Your Videos - Graphics Designing Course in Raipur.

Want your videos to look like they belong on TV? Motion text & lower thirds are the secret to giving your content a polished, professional edge. These dynamic text overlays, titles, and name graphics add style and clarity, making your videos stand out on YouTube, Instagram, or even corporate promos. This beginner-friendly guide walks you through how to create and animate text to achieve that broadcast-quality feel. From crafting eye-catching titles to designing sleek lower thirds, you’ll learn simple steps to elevate your videos. Let’s dive into the world of motion text & lower thirds and make your content shine!


What Are Motion Text & Lower Thirds?

Motion text & lower thirds are animated text elements that enhance your videos. Motion text includes dynamic titles, captions, or overlays that move, fade, or scale to grab attention. Lower thirds are graphics (usually at the bottom of the screen) that display names, titles, or key information, like “John Doe, CEO” in an interview. These elements are common in TV broadcasts, vlogs, and social media videos to add professionalism and context.

This guide will show you how to create motion text & lower thirds that make your videos look sharp and engaging.


Why Motion Text & Lower Thirds Matter

Adding motion text & lower thirds can transform your videos. Here’s why they’re so important:

  • Boosts Professionalism: Sleek text makes your videos look polished and broadcast-ready.
  • Clarifies Information: Lower thirds introduce people or highlight key points clearly.
  • Grabs Attention: Animated text hooks viewers, especially in fast-paced platforms like TikTok.
  • Enhances Branding: Use consistent fonts and colors to reinforce your brand.
  • Improves Accessibility: Text overlays help viewers understand content without sound.

Whether you’re a YouTuber or a business, motion text & lower thirds take your videos to the next level.


The Building Blocks of Motion Text & Lower Thirds

To create stunning text overlays, you need to understand three key elements: design, animation, and integration. Let’s break them down simply.

1. Design: Create Eye-Catching Text

The look of your text sets the tone. Here’s how to design motion text & lower thirds:

  • Choose Readable Fonts: Use bold, clear fonts like Montserrat or Roboto for easy reading.
  • Pick Brand Colors: Match text and background colors to your brand or video’s mood (e.g., blue for calm, red for energy).
  • Add Backgrounds: Place text on a semi-transparent box or shape for contrast and readability.
  • Keep It Simple: Avoid cluttered designs—stick to one or two fonts and minimal graphics.

Pro Tip: Use Adobe Fonts or Google Fonts for free, professional font options.

2. Animation: Bring Text to Life

Animation makes motion text & lower thirds dynamic. Here’s how to animate them:

  • Use Simple Motions: Try fades, slides, or zooms for smooth entrances and exits.
  • Time It Right: Make text appear when it’s relevant, like a name during an interview.
  • Keep It Short: Animations should last 1-2 seconds to avoid distracting viewers.
  • Add Easing: Use “easy ease” in editing apps for natural, smooth motion.

Pro Tip: Watch TV news or YouTube vlogs to see how pros animate their text.

3. Integration: Blend with Your Video

Text should feel like part of the video, not an afterthought. Here’s how to integrate motion text & lower thirds:

  • Match the Style: Ensure text matches your video’s vibe (e.g., playful for Reels, sleek for promos).
  • Position Wisely: Place lower thirds in the bottom third of the screen to avoid covering key visuals.
  • Sync with Audio: Time text animations to music beats or voiceovers for impact.
  • Test Readability: Ensure text is clear on small screens like phones.

Pro Tip: Preview your video with text on a phone to check size and clarity.


Step-by-Step Guide to Motion Text & Lower Thirds

Ready to add professional text to your videos? Follow these easy steps for motion text & lower thirds.

Step 1: Plan Your Text

Before you start, plan what your text will say and how it’ll look. Ask yourself:

  • What’s the Purpose? Are you introducing a person, highlighting a tip, or adding a title?
  • What’s the Style? Playful for social media or formal for corporate videos?
  • Where Will It Go? Decide if it’s a title at the start or a lower third during a scene.

Write down the text (e.g., “Sarah Lee, Travel Vlogger”) and sketch where it’ll appear.

Step 2: Choose Your Tools

You don’t need expensive software to create motion text & lower thirds. Here are beginner-friendly options:

  • Free Apps: CapCut, Canva, or VN Video Editor offer built-in text tools.
  • Pro Software: Adobe After Effects or Premiere Pro for advanced animations.
  • Templates: Use pre-made templates from Envato Elements or Motion Array for quick results.

Pro Tip: Start with free apps to learn the basics before moving to pro tools.

Step 3: Design Your Text

Create your text and lower thirds in your chosen app:

  • Add Text: Use the text tool to type your title or lower third (e.g., “New Product Launch”).
  • Customize Fonts: Choose a bold, readable font and adjust size for clarity.
  • Add Graphics: Include a shape or bar behind the text for a polished look.
  • Set Colors: Use contrasting colors (e.g., white text on a dark box) for readability.

Pro Tip: Save your design as a template to reuse across videos for consistency.

Step 4: Animate Your Text

Bring your text to life with animation:

  • Choose an Animation: In your app, select a preset like “Fade In” or “Slide Left.”
  • Use Keyframes (Pro Tools): In After Effects or Premiere, add keyframes to animate position, scale, or opacity.
  • Time It: Make text appear for 3-5 seconds, synced with key video moments or audio beats.
  • Add Easing: Smooth out animations with “easy ease” for a natural feel.

Pro Tip: Keep animations subtle to avoid overwhelming viewers.

Step 5: Integrate and Export

Make sure your text fits seamlessly into your video:

  • Place Text: Position lower thirds in the bottom left or right corner. Place titles center-screen or at the top.
  • Sync with Video: Align text animations with cuts, music beats, or voiceovers.
  • Check Readability: Ensure text is clear on small screens and doesn’t block key visuals.
  • Export: Use H.264 format with 1080p resolution for platforms like YouTube or Instagram.

Pro Tip: Test your video on a phone to confirm text looks great on mobile.


Motion Text & Lower Thirds for Different Platforms

Each platform has unique text needs. Here’s how to adapt:

1. Instagram Reels and TikTok

  • Length: Text appears for 1-3 seconds.
  • Style: Bold, colorful fonts with quick animations (e.g., pop-in or zoom).
  • Placement: Center or top for captions, bottom for lower thirds.
  • Animation: Fast and playful to match the platform’s energy.

2. YouTube Videos

  • Length: Text stays on screen for 3-5 seconds.
  • Style: Clean, readable fonts with subtle animations (e.g., fade or slide).
  • Placement: Lower thirds for names, center for titles or end screens.
  • Animation: Smooth and professional to suit longer content.

3. Corporate or Promotional Videos

  • Length: Text on screen for 4-6 seconds.
  • Style: Sleek fonts with branded colors and minimal graphics.
  • Placement: Lower thirds for names/titles, center for intros or promos.
  • Animation: Subtle fades or slides for a polished look.

Common Motion Text & Lower Thirds Mistakes to Avoid

Avoid these pitfalls for better text:

  • Cluttered Designs: Too many fonts or colors look messy. Stick to simple designs.
  • Hard-to-Read Text: Small or low-contrast text is tough to read on phones.
  • Overdone Animations: Flashy effects can distract from your video’s message.
  • Bad Timing: Text that appears too early or late feels off. Sync it carefully.

Tools for Motion Text & Lower Thirds

You don’t need pro gear to create great text. Try these:

  • Editing Apps: Free tools like CapCut, Canva, or VN Video Editor; pro tools like Adobe After Effects or Premiere Pro.
  • Templates: Find pre-made lower thirds on Envato Elements, Motion Array, or Canva.
  • Fonts: Use free fonts from Google Fonts or Adobe Fonts for professional looks.
  • Stock Graphics: Get free shapes or icons from Pexels or Flaticon to enhance designs.

Learning More About Motion Text & Lower Thirds

Improve your text skills with these resources:

  • YouTube Channels: Watch Video Copilot or Motion Array for text animation tutorials.
  • Online Courses: Skillshare and Udemy offer classes on After Effects and text design.
  • Communities: Join Reddit’s r/AfterEffects or r/VideoEditing for tips.
  • Practice: Create short videos with different text styles weekly to experiment.

Why Motion Text & Lower Thirds Rock in 2025

As of July 2025, motion text & lower thirds are key to standing out in a crowded video landscape. With short-form content dominating platforms like TikTok and YouTube Shorts, dynamic text grabs attention fast. AI tools in apps like Adobe After Effects (e.g., auto-text animation) and CapCut make creating motion text & lower thirds easier than ever, even for beginners. By adding professional text, you can make your videos look broadcast-ready.


Conclusion

Motion text & lower thirds are your ticket to creating videos with a professional, broadcast feel. By designing clear text, adding smooth animations, and syncing them with your video, you can captivate audiences on any platform. Whether you’re making Reels, YouTube videos, or promos, start with free tools, experiment with animations, and keep it simple. With these tips, you’ll master motion text & lower thirds in no time.

Ready to make your videos pop? Open your editing app and start designing! To learn more about graphic designing practically join our institute YourPaathshaala in raipur or contact us at 8305209520 for more information.