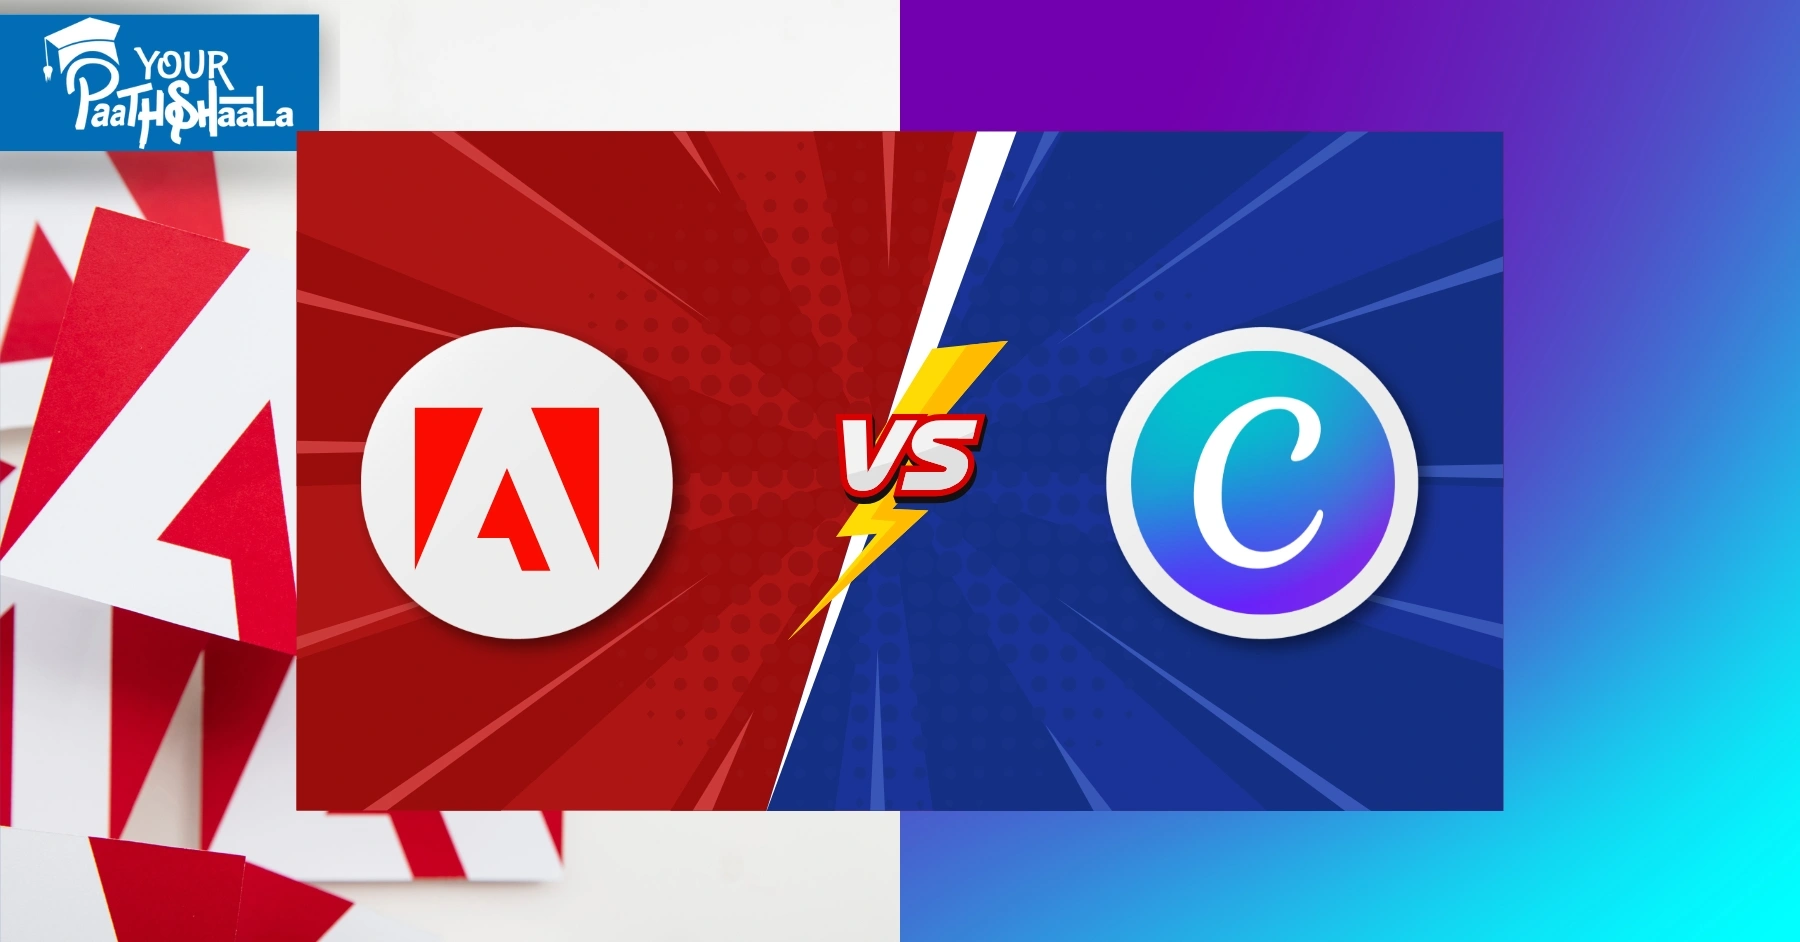
Canva vs Adobe Creative Suite, which is better worth money? - Yourpaatshaala graphic designing course in Raipur.

Canva vs Adobe Creative Suite 2025: Which Design Platform is Worth Your Money?

Canva vs Adobe Creative Suite, which is better worth money? - Yourpaatshaala graphic designing course in Raipur.

Choosing the right design platform in 2025 can make or break your creative workflow. Canva and Adobe Creative Suite are two giants in graphic design, but they cater to different needs. Canva’s drag-and-drop simplicity is perfect for beginners, while Adobe’s professional-grade tools like Photoshop and Illustrator dominate for advanced designers. With Canva’s growing AI features and Adobe’s Creative Cloud innovations, which is worth your money? This beginner-friendly guide dives into Canva vs Adobe Creative Suite 2025, comparing features, pricing, ease of use, and more to help you decide. Whether you’re a small business owner or a pro designer, let’s find your perfect fit!


What Are Canva and Adobe Creative Suite?

Canva: Launched in 2013, Canva is a cloud-based design platform known for its intuitive drag-and-drop interface. It offers over 250,000 free templates, AI tools like Magic Studio, and a vast library of stock photos, making it ideal for quick designs like social media posts, flyers, and logos.

Adobe Creative Suite: Adobe Creative Cloud (CC) is a suite of nearly 30 professional-grade apps, including Photoshop (photo editing), Illustrator (vector graphics), InDesign (layouts), and Adobe Express (a Canva-like tool). It’s the industry standard for designers, offering unmatched control and advanced features.

This guide compares Canva vs Adobe Creative Suite 2025 to see which suits your budget and goals.


Why Canva vs Adobe Creative Suite 2025 Matters

Choosing between Canva and Adobe Creative Suite in 2025 depends on your skill level, budget, and project needs. Here’s why this comparison is crucial:

  • Ease of Use: Canva is beginner-friendly; Adobe has a steep learning curve but offers more power.
  • Cost: Canva’s free tier and affordable plans suit tight budgets, while Adobe’s subscriptions are pricier.
  • Features: Canva excels in quick designs; Adobe offers advanced editing for professional work.
  • Target Audience: Canva is great for non-designers; Adobe is built for pros.
  • Trends in 2025: Both platforms are advancing with AI, but which delivers better value?

This comparison will help you invest in the right tool for your creative projects.


Canva vs Adobe Creative Suite 2025: Key Comparisons

Let’s break down Canva vs Adobe Creative Suite 2025 across five key areas: ease of use, features, pricing, collaboration, and output quality.

1. Ease of Use: Beginner-Friendly vs Professional-Grade

Canva

  • Interface: Drag-and-drop simplicity with a clean, intuitive layout. Beginners can create designs in minutes without prior experience.
  • Learning Curve: Minimal—most users master it in hours. Templates and tutorials make it accessible.
  • Best For: Non-designers, small businesses, and marketers needing quick graphics.
  • Drawback: Limited control for complex edits like hand-drawn vectors.

Adobe Creative Suite

  • Interface: Varies by app. Adobe Express is beginner-friendly, similar to Canva, but Photoshop, Illustrator, and InDesign are complex with extensive toolsets.
  • Learning Curve: Steep, especially for Photoshop and Illustrator. Adobe Express has a quicker learning curve, but other apps require weeks to master.
  • Best For: Professional designers, photographers, and video editors needing advanced tools.
  • Drawback: Overwhelming for beginners without design experience.

Verdict: Canva wins for ease of use, perfect for beginners. Adobe suits pros or those willing to learn complex tools.

2. Features: Templates vs Advanced Editing

Canva

  • Templates: Over 250,000 free templates and 400,000+ with Pro for social media, flyers, and more.
  • AI Tools: Magic Studio includes AI image generation, background removal, and text-to-design features.
  • Editing: Basic photo editing, cropping, and filters. Lacks advanced tools like layer masking or vector drawing.
  • Extras: Brand Hub for consistent branding, real-time collaboration, and integrations with Google Drive and social platforms.

Adobe Creative Suite

  • Templates: Adobe Express offers 220,000+ templates, but Photoshop and Illustrator rely on user-sourced assets or Adobe Stock (250 million assets).
  • AI Tools: Adobe Firefly (in Express) offers text-to-image, generative fill, and text effects. Sensei AI enhances editing in Photoshop and Lightroom.
  • Editing: Unmatched power—Photoshop for pixel-perfect edits, Illustrator for vectors, InDesign for layouts, and Premiere Pro for video.
  • Extras: Seamless app integration, 30,000+ Adobe Fonts, and cloud libraries for asset sharing.

Verdict: Adobe wins for advanced features and flexibility; Canva excels for quick, template-based designs.

3. Pricing: Budget-Friendly vs Premium Investment

Canva

  • Free Plan: Robust with thousands of templates, basic editing, and limited AI tools.
  • Pro Plan: $12.99/month or $119.99/year (~$9.99/month) for premium templates, AI features, and Brand Hub.
  • Teams Plan: $7.99/user/month for collaboration (minimum 2 users).
  • Value: Affordable for beginners and small businesses. Recent price hike concerns reversed after user backlash.

Adobe Creative Suite

  • Free Plan: Limited to Adobe Express with basic features and fewer templates.
  • Adobe Express Premium: $9.99/month for AI tools and premium assets.
  • Creative Cloud All Apps: $59.99-$89.99/month for 20+ apps, including Photoshop, Illustrator, and InDesign. Single apps (e.g., Illustrator) at $31.99/month.
  • Value: Expensive but includes industry-standard tools. Free Express plan is less robust than Canva’s.

Verdict: Canva wins for affordability and free tier functionality. Adobe is pricier but offers more for professionals.

4. Collaboration: Team Workflows and Integration

Canva

  • Features: Real-time editing, shared workspaces, and Brand Hub for centralized logos, fonts, and colors. Comments and approvals streamline team workflows.
  • Integrations: Connects with Google Drive, Dropbox, and social media for easy sharing.
  • Best For: Small teams and non-designers collaborating on quick projects.

Adobe Creative Suite

  • Features: Cloud libraries sync assets across apps (e.g., Photoshop to Illustrator). Adobe Express supports team templates, but full Creative Cloud excels for large design teams.
  • Integrations: Deep integration with Adobe apps, Slack, Microsoft Teams, and CRMs.
  • Best For: Professional teams needing seamless asset sharing and complex workflows.

Verdict: Adobe wins for professional team integration; Canva is better for small, non-designer teams.

5. Output Quality: Professional Polish vs Quick Results

Canva

  • Quality: High-quality outputs for digital (PNG, JPG, MP4) and print (PDF, SVG with Pro). Great for social media and basic print.
  • Limitations: Lacks precision for complex vector art or high-end print layouts.
  • Accessibility: Better for accessible PDFs than Adobe Express, but limited compared to InDesign.

Adobe Creative Suite

  • Quality: Industry-standard outputs with pixel-perfect precision (Photoshop), scalable vectors (Illustrator), and professional layouts (InDesign). Supports CMYK for print.
  • Limitations: Adobe Express outputs are simpler, similar to Canva, but full suite excels for pro-grade work.
  • Accessibility: Express improves PDF accessibility, but full suite requires expertise.

Verdict: Adobe wins for professional-grade output; Canva is sufficient for quick, digital-first designs.


Canva vs Adobe Creative Suite 2025: Which Should You Choose?

Choose Canva If:

  • You’re a beginner, small business owner, or marketer needing quick, professional designs.
  • Budget is a concern—Canva’s free tier and $12.99/month Pro plan are affordable.
  • You want templates and AI tools for social media, flyers, or presentations.
  • Your team needs simple collaboration without a steep learning curve.

Example Use Case: A small bakery creating Instagram posts and flyers with Canva’s templates and Magic Studio AI.

Choose Adobe Creative Suite If:

  • You’re a professional designer, photographer, or video editor needing advanced tools.
  • You require precise control for vector art, photo editing, or print layouts.
  • Your team uses multiple Adobe apps and needs seamless integration.
  • Budget allows for $59.99+/month for Creative Cloud or $9.99/month for Express.

Example Use Case: A design agency creating a brand campaign with Illustrator, Photoshop, and InDesign.


Step-by-Step Tutorial: Create a Social Media Post

Here’s a quick comparison of creating an Instagram post in Canva vs Adobe Creative Suite (using Adobe Express).

Canva Workflow

  1. Open Canva: Sign in at canva.com (free or Pro).
  2. Choose Template: Select “Instagram Post” and pick a template from 250,000+ options.
  3. Customize: Use Magic Studio to generate an AI image (e.g., “vintage coffee shop vibe”) or upload your own. Add text with fonts like Montserrat.
  4. Edit: Adjust colors, add a logo via Brand Hub, and apply animations.
  5. Export: Save as PNG or MP4 in ~10 minutes.

Adobe Express Workflow

  1. Open Express: Sign in at adobe.com/express (free or $9.99/month).
  2. Choose Template: Select from 220,000+ templates for Instagram.
  3. Customize: Use Firefly AI for text-to-image or generative fill. Add text with Adobe Fonts (30,000+ options).
  4. Edit: Reorder layers easily (visible in top-right) and add animations.
  5. Export: Save as PNG or MP4 in ~12 minutes.

Verdict: Canva is faster for beginners; Adobe Express offers cleaner layer control for pros.


Common Mistakes to Avoid

  • Canva: Relying only on templates—customize to avoid generic designs.
  • Adobe: Starting with Photoshop or Illustrator without tutorials—begin with Express for simplicity.
  • Both: Ignoring brand consistency—use Brand Hub (Canva) or cloud libraries (Adobe) for cohesive designs.
  • Accessibility: Forgetting to check PDF accessibility, especially for Canva outputs.

Learning More About Canva and Adobe Creative Suite

  • Canva: Check Canva’s Design School or YouTube channels like The Futur for tutorials.
  • Adobe: Explore Adobe’s Learn hub or Video Copilot for Photoshop/Illustrator guides.
  • Communities: Join Reddit’s r/GraphicDesign or X for user tips. One X user recommends Adobe Illustrator for industry roles but praises Canva for learning design basics.
  • Practice: Create one design weekly to master either platform.

Why Canva vs Adobe Creative Suite 2025 Is a Hot Topic

In 2025, Canva’s acquisition of Leonardo.Ai and partnership with Getty Images (350 million assets) strengthen its AI and stock library, rivaling Adobe Firefly and Adobe Stock. Adobe’s Creative Cloud remains the industry standard, with 4.7/5 ratings from 7,386 reviews for its comprehensive tools, though some users criticize its cost. Canva’s 4.7/5 from 12,877 reviews highlights its accessibility and affordability. Both platforms are evolving, making this comparison critical for creators.


Conclusion

Canva vs Adobe Creative Suite 2025 boils down to your needs and budget. Canva is the go-to for beginners, small businesses, and quick designs, offering a robust free tier and affordable Pro plan. Adobe Creative Suite, with apps like Photoshop, Illustrator, and Adobe Express, is ideal for professionals needing advanced editing and integration. If you’re starting out or on a budget, Canva’s simplicity wins. For pro-grade work, Adobe’s power is unmatched. Try Canva’s free plan or Adobe Express to see which fits your workflow! To learn more about graphic designing practically join our institute YourPaathshaala in raipur or contact us at 8305209520 for more information.
How to Create Professional Logos Using AI: Step-by-Step Tutorial for Beginners - YourPaatshaala Graphic Designing Course.

How to Create Professional Logos Using AI: Step-by-Step Tutorial for Beginners

How to Create Professional Logos Using AI: Step-by-Step Tutorial for Beginners - YourPaatshaala Graphic Designing Course.

Designing a professional logo used to require expensive software and years of experience, but AI has changed the game. With tools like Canva, Midjourney, and Looka, anyone can create professional logos using AI, even without design skills. These tools generate stunning logo concepts, streamline customization, and save time, making them perfect for entrepreneurs, freelancers, or hobbyists. This beginner-friendly guide walks you through a step-by-step tutorial to create professional logos using AI, from brainstorming ideas to finalizing your design. Whether for a business, blog, or side hustle, let’s dive into how to create professional logos using AI and make your brand shine!


Why Create Professional Logos Using AI?

AI-powered logo design offers unique advantages for beginners and pros alike. Here’s why you should create professional logos using AI:

  • Saves Time: AI generates logo concepts in seconds, cutting down design time.
  • Budget-Friendly: Many tools are free or affordable, unlike hiring a designer.
  • User-Friendly: No design experience needed—AI handles the heavy lifting.
  • Customizable: Tweak colors, fonts, and layouts to match your brand.
  • Versatile Outputs: Create logos for websites, business cards, or social media.

By mastering AI logo creation, you can craft professional visuals that stand out without breaking the bank.


The Building Blocks of Creating Professional Logos Using AI

To create professional logos using AI, you need to understand three key components: ideation, design generation, and customization. Let’s break them down simply.

1. Ideation: Brainstorm Your Logo Concept

A great logo starts with a clear idea. AI tools help spark inspiration:

  • Define Your Brand: Identify your brand’s vibe (e.g., modern, playful, or elegant) and target audience.
  • Use AI for Ideas: Tools like ChatGPT can suggest logo styles or themes based on your business.
  • Inspiration Platforms: Browse Pinterest or Behance for logo trends to guide your AI prompts.

Example: For a coffee shop, you might want a “vintage, cozy” logo with a coffee cup icon.

2. Design Generation: Let AI Create the Base

AI tools generate logo concepts from text prompts or templates:

  • Text-to-Image AI: Midjourney or DALL-E 3 create unique logo designs from descriptions.
  • Template-Based AI: Canva or Looka offer AI-driven templates for quick designs.
  • Vector Conversion: Recraft converts AI images into scalable vectors for professional use.

Pro Tip: Start with simple prompts and refine them for better results.

3. Customization: Make It Your Own

AI logos need tweaking to feel personal and professional:

  • Edit Colors: Match your brand’s color palette for consistency.
  • Adjust Fonts: Choose bold, readable fonts for text-based logos.
  • Add Elements: Include icons or shapes to enhance the design.
  • Polish in Editors: Use Canva or Adobe Express for final tweaks.

Pro Tip: Keep your logo simple—avoid cluttered designs for versatility.


Step-by-Step Tutorial: Create Professional Logos Using AI

This tutorial guides you through creating a professional logo for a fictional bakery using AI tools. It’s designed for beginners and uses free or affordable platforms.

Step 1: Plan Your Logo

Define your logo’s purpose and style:

  • Business: “Sweet Bloom Bakery.”
  • Goal: Create a logo for business cards and social media.
  • Style: Cozy, vintage, with warm colors (e.g., beige, brown) and a cupcake icon.
  • Audience: Local customers, foodies, and families.

Write a brief: “Design a vintage bakery logo with a cupcake, warm tones, and elegant text.” Optionally, use ChatGPT to brainstorm prompts like “vintage bakery logo, cupcake centerpiece, soft beige background.”

Time: 5 minutes

Step 2: Choose Your AI Tools

Select beginner-friendly tools to create professional logos using AI:

  • Midjourney: For generating unique, artistic logo concepts (paid, but trial available).
  • Canva: Free AI-powered templates and text effects for quick designs.
  • Looka: AI-driven logo generator with free previews (paid for downloads).
  • Recraft: Free vectorization to make AI logos scalable.
  • Adobe Firefly: Free with an Adobe account for commercial-safe designs.

Recommendation: Start with Canva for its free tier and ease, or Midjourney for creative designs.

Time: 5 minutes

Step 3: Generate the Logo Base

Use AI to create your initial logo design. Here’s how with two tools:

Option 1: Canva (Free)

  1. Open Canva: Visit canva.com and sign up for a free account.
  2. Select Template: Choose “Logo” from the template library and search “bakery.”
  3. Use AI Magic Studio: Enter “vintage cupcake logo, warm tones” in Magic Design to generate a custom template.
  4. Customize: Swap the cupcake icon, adjust colors to beige/brown, and select a font like Playfair Display.
  5. Preview: Check the logo on a mockup (e.g., business card) in Canva.

Option 2: Midjourney (Trial or Paid)

  1. Access Midjourney: Join via Discord or midjourney.com (use trial for free).
  2. Enter Prompt: Type “/imagine vintage bakery logo, cupcake centerpiece, warm beige tones, elegant text, minimalist –ar 1:1.”
  3. Generate: Receive four designs in ~1 minute. Select the best and upscale with “–v 6.”
  4. Vectorize: Upload to Recraft (free) to convert to a scalable SVG file.

Time: 10-15 minutes

Step 4: Customize Your Logo

Refine your AI-generated logo to make it professional:

  • Colors: Adjust to match your brand (e.g., beige #F5E8C7, brown #5C4033).
  • Fonts: Use a clean, readable font like Lora or Montserrat for text like “Sweet Bloom Bakery.”
  • Icons: Add or tweak a cupcake icon in Canva or Adobe Express.
  • Layout: Ensure the logo is balanced—center the cupcake and place text below or beside it.
  • Test Versatility: Check how it looks on light and dark backgrounds.

Use Canva’s free editor or Adobe Express for easy tweaks. If using Midjourney, import the SVG into Canva for text and color adjustments.

Time: 10-15 minutes

Step 5: Finalize and Export

Polish and prepare your logo for use:

  • Review: Ensure the logo is clear at small sizes (e.g., favicon) and large sizes (e.g., signage).
  • Get Feedback: Share with friends or use Artwork Flow for team feedback.
  • Export Formats: Save as PNG (transparent background) for digital use and SVG for print.
  • Mockups: Test the logo on business cards or social media in Canva’s mockup tool.

Pro Tip: Export multiple versions (e.g., color, black-and-white) for flexibility.

Time: 5-10 minutes

Total Time: ~35-45 minutes


Best AI Tools to Create Professional Logos Using AI

Here’s a quick overview of the top tools for this tutorial, based on ease of use, cost, and output quality:

  1. Canva:
    • Cost: Free tier; Pro at $12.99/month.
    • Features: AI-powered Magic Studio, templates, and easy editing.
    • Best For: Beginners wanting quick, template-based logos.
  2. Midjourney:
    • Cost: $10/month; limited trial (~25 minutes).
    • Features: High-quality, artistic logo concepts from text prompts.
    • Best For: Creative, unique designs with minimal effort.
  3. Looka:
    • Cost: Free previews; $20-$80 for downloads.
    • Features: AI-generated logos with brand kit options.
    • Best For: Business owners needing full branding packages.
  4. Adobe Firefly:
    • Cost: Free with Adobe account.
    • Features: Commercial-safe designs with text effects.
    • Best For: Adobe users creating professional logos.
  5. Recraft:
    • Cost: Free vectorization; paid plans for advanced features.
    • Features: Converts AI images to scalable vectors.
    • Best For: Ensuring logos are print-ready.

Tips for Creating Professional Logos Using AI

  • Keep It Simple: Avoid cluttered designs—aim for one or two elements (e.g., icon + text).
  • Be Specific with Prompts: For Midjourney, use detailed prompts like “minimalist bakery logo, cupcake, warm beige tones.”
  • Check Scalability: Ensure the logo looks good at small (50x50px) and large sizes.
  • Match Your Brand: Use colors and fonts that reflect your brand’s personality.
  • Test Versatility: Create versions for light/dark backgrounds and digital/print use.

Common Mistakes to Avoid

  • Vague AI Prompts: Unclear prompts like “bakery logo” yield generic results. Be specific, e.g., “vintage cupcake logo, beige tones.”
  • Overcomplicating Designs: Too many colors or elements make logos hard to use.
  • Ignoring Licensing: Ensure AI-generated logos (e.g., from Firefly) are commercial-safe.
  • Skipping Vectorization: Non-vector logos pixelate when scaled. Use Recraft for SVGs.

Learning More About Creating Professional Logos Using AI

Boost your skills with these resources:

  • YouTube Channels: Watch Will Paterson or The Futur for logo design tips.
  • Courses: Skillshare’s “AI for Visual Design” or ELVTR’s AI-aided design courses.
  • Communities: Join Reddit’s r/GraphicDesign or X for AI logo tips.
  • Practice: Create one logo weekly to refine your AI prompt skills.

Why Create Professional Logos Using AI in 2025

As of July 2025, AI logo design is booming, with tools like Canva and Midjourney making professional results accessible to all. A 2024 survey noted 98% of U.S. designers use AI daily for efficiency, and X posts highlight Canva’s Magic Studio and Looka for fast logo creation. With the design market growing, AI tools help beginners create professional logos using AI without hiring expensive designers, saving time and money.


Conclusion

Creating professional logos using AI is easier than ever with tools like Canva, Midjourney, Looka, Adobe Firefly, and Recraft. This step-by-step tutorial shows how beginners can design stunning logos in under an hour, from brainstorming to exporting. Start with a clear plan, generate designs with AI, and customize for your brand. Whether for a business, blog, or social media, these tools make logo creation fast, affordable, and fun. Ready to design your logo? Pick a tool and create professional logos using AI today! To learn more about graphic designing practically join our institute YourPaathshaala in raipur or contact us at 8305209520 for more information.
Midjourney Alternatives Free: Top AI Image Generators for 2025 - YourPaatshaala Graphic Design Classes in Raipur.

Midjourney Alternatives Free: Top AI Image Generators for 2025

Midjourney Alternatives Free: Top AI Image Generators for 2025 - YourPaatshaala Graphic Design Classes in Raipur.

Midjourney is a powerhouse for creating stunning AI-generated images, but its $10/month price tag can be a barrier for beginners or budget-conscious creators. Luckily, 2025 offers a range of free Midjourney alternatives that deliver impressive visuals without breaking the bank. From photorealistic designs to anime-style art, these tools make AI image generation accessible to everyone. This beginner-friendly guide explores the top free Midjourney alternatives, their features, and how to use them for your creative projects. Whether you’re designing social media posts or concept art, let’s dive into Midjourney alternatives free and unleash your creativity!


Why Look for Free Midjourney Alternatives?

Midjourney’s paid model and Discord-based interface may not suit everyone. Here’s why free alternatives are worth exploring:

  • Cost Savings: Free tools let you experiment without a subscription.
  • User-Friendly Interfaces: Many alternatives offer simpler web-based platforms compared to Midjourney’s Discord setup.
  • Diverse Features: From text-to-image to inpainting, free tools offer unique capabilities.
  • Accessibility: Some alternatives work offline or on low-spec devices.
  • Community Support: Open-source options like Stable Diffusion have active communities for tips and custom models.

This guide highlights the best free Midjourney alternatives to fit your creative needs.


Top Free Midjourney Alternatives for 2025

Here are five standout free Midjourney alternatives, with their key features, pros, cons, and beginner-friendly tutorials. These tools were selected based on ease of use, output quality, and accessibility, drawing from recent web sources and user feedback.

1. Stable Diffusion (via DreamStudio or Local Setup)

Overview: Stable Diffusion, developed by Stability AI, is an open-source AI image generator known for its flexibility and high-quality outputs. It’s accessible online via platforms like DreamStudio or locally on PCs with at least 8GB VRAM.

Key Features:

  • Generate images from text prompts or reference images.
  • Advanced settings like negative prompts, seed values, and custom models.
  • Free to use locally; DreamStudio offers 25 free credits.
  • Supports inpainting, outpainting, and style customization.

Pros:

  • Highly customizable with community-trained models for unique styles.
  • Free for local use or via third-party sites like stablediffusionweb.com.
  • Runs offline with local setup, ideal for privacy-focused users.

Cons:

  • Local setup requires technical knowledge and a decent GPU.
  • Online versions may have server delays or limited free credits.

Tutorial: Create a Social Media Graphic

  1. Access DreamStudio: Visit dreamstudio.ai and sign up for a free account (25 credits).
  2. Enter Prompt: Type “vibrant coffee shop poster, retro style, warm tones” in the prompt box. Add a negative prompt like “blurry, low quality” to refine results.
  3. Adjust Settings: Set resolution to 512×512 and 30 steps for quality.
  4. Generate: Click “Generate” to create images in ~20 seconds.
  5. Edit: Use Canva to add text or export as PNG for Instagram.
    Time: ~10 minutes

Best For: Creators seeking customization and free local use.

2. DALL-E 3 (via Microsoft Copilot)

Overview: Developed by OpenAI, DALL-E 3 is a powerful AI image generator integrated into Microsoft Copilot, offering free access with a Microsoft account. It excels at photorealistic and nuanced images.

Key Features:

  • Free via Copilot with 15 daily boosts for fast generation.
  • Conversational prompting allows refining images with follow-up requests.
  • High-resolution outputs with accurate prompt interpretation.
  • No human face generation due to OpenAI’s restrictions.

Pros:

  • Beginner-friendly with a simple web interface.
  • Free with a Microsoft account; no setup required.
  • High-quality, detailed images from natural language prompts.

Cons:

  • Limited to 15 fast generations daily; slower without boosts.
  • No advanced editing like inpainting or upscaling within Copilot.

Tutorial: Create a Fantasy Landscape Poster

  1. Access Copilot: Visit copilot.microsoft.com and sign in.
  2. Enter Prompt: Type “epic fantasy landscape, glowing castle, sunset, ultra-realistic.”
  3. Generate: Submit to create one or two images in ~30 seconds.
  4. Refine: Add follow-up prompts like “add a dragon in the sky” to tweak.
  5. Export: Download as PNG and edit in Canva for text overlays.
    Time: ~8 minutes

Best For: Beginners wanting quick, high-quality results without setup.

3. Playground AI

Overview: Playground AI is a user-friendly platform using Stable Diffusion XL and its own models, offering up to 50 free images daily with a commercial license. It’s ideal for social media and hybrid image creation.

Key Features:

  • 50 free images/day; Pro plan for 1,000 images/day at $15/month.
  • Supports Stable Diffusion XL, Playground v3, and image-to-image generation.
  • Filters for inpainting, upscaling, and face restoration.
  • Community feed for inspiration and prompt ideas.

Pros:

  • Generous free tier with commercial use allowed.
  • Intuitive interface, great for beginners.
  • Fast generation with multiple model options.

Cons:

  • Free tier limits advanced features like high-resolution upscaling.
  • Slower results after daily limit is reached.

Tutorial: Create an Anime-Style Character

  1. Access Playground AI: Visit playgroundai.com and sign up.
  2. Select Model: Choose Stable Diffusion XL or Playground v3.
  3. Enter Prompt: Input “anime character, blue hair, futuristic city, detailed.”
  4. Generate: Create up to four images in ~15 seconds.
  5. Export: Download as PNG or use Canva for further edits.
    Time: ~10 minutes

Best For: Social media creators and anime enthusiasts.

4. Adobe Firefly (Beta)

Overview: Adobe Firefly, integrated with Adobe’s Creative Cloud, is a free AI image generator for users with an Adobe account. It’s known for commercial-safe outputs and seamless Adobe ecosystem integration.

Key Features:

  • Free with an Adobe account via firefly.adobe.com.
  • Text-to-image, generative fill, and text effects for creative text styling.
  • High-quality outputs with style transfer and customization.
  • Commercial use allowed with copyright-safe training data.

Pros:

  • User-friendly web portal, ideal for Adobe users.
  • High-quality, professional-grade images.
  • No subscription needed for basic use.

Cons:

  • Beta version may have occasional bugs.
  • Limited free credits; advanced features require Creative Cloud.

Tutorial: Create a Product Mockup

  1. Access Firefly: Visit firefly.adobe.com and sign in.
  2. Enter Prompt: Type “modern product mockup, smartphone on wooden table, minimalist.”
  3. Customize: Select “Photorealistic” style and adjust aspect ratio.
  4. Generate: Create images in ~20 seconds.
  5. Export: Download as PNG or import into Photoshop for edits.
    Time: ~12 minutes

Best For: Professionals using Adobe tools for commercial projects.

5. Craiyon

Overview: Craiyon (formerly DALL-E Mini) is a free, web-based AI image generator with no credit limits, ideal for quick, simple creations. It’s ad-supported but beginner-friendly.

Key Features:

  • Unlimited free image generation with ads.
  • Supports multiple styles (art, photo, drawing).
  • Negative prompts and basic customization options.
  • Generates nine images per prompt.

Pros:

  • No account or credits needed; fully free.
  • Simple interface for fast results.
  • Decent quality for basic prompts.

Cons:

  • Ads can be intrusive on the free version.
  • Lower resolution and less detail than Midjourney.

Tutorial: Create a Logo Concept

  1. Access Craiyon: Visit craiyon.com, no sign-up needed.
  2. Enter Prompt: Type “minimalist logo, coffee cup, monochrome.”
  3. Generate: Create nine images in ~60 seconds.
  4. Select: Choose the best image and download as PNG.
  5. Edit: Use Canva to refine the logo.
    Time: ~10 minutes

Best For: Casual creators needing quick, free logos or art.


Midjourney Alternatives Free: Comparison Table

ToolFree TierEase of UseCustomizationOutput QualityBest For
Stable DiffusionFree (local or DreamStudio)ModerateHighHigh (with tweaking)Custom designs, offline use
DALL-E 3 (Copilot)Free (15 boosts/day)EasyModerateHighQuick, photorealistic images
Playground AI50 images/dayEasyHighHighSocial media, anime art
Adobe FireflyFree with Adobe accountEasyModerateHighCommercial projects, Favors
CraiyonUnlimited (ad-supported)Very EasyBasicModerateQuick logos, casual art

How to Choose the Right Free Midjourney Alternative

Consider these factors when picking a tool:

  • Ease of Use: Craiyon and DALL-E 3 (Copilot) are simplest for beginners.
  • Customization Needs: Stable Diffusion and Playground AI offer advanced controls.
  • Output Style: DALL-E 3 and Firefly excel in photorealism; Playground AI is great for anime.
  • Commercial Use: Firefly and Playground AI allow commercial use in free tiers.
  • Hardware: Stable Diffusion (local) needs a decent GPU; others are web-based.

Step-by-Step Workflow: Creating a Social Media Graphic

Here’s a general workflow using any free Midjourney alternative:

  1. Choose a Tool: Pick Playground AI for ease or Stable Diffusion for control.
  2. Define Prompt: Write a clear prompt, e.g., “vibrant travel poster, tropical beach, sunset.”
  3. Customize: Adjust style, resolution, or negative prompts (if available).
  4. Generate: Create images (usually 1-9 per prompt) in 10-60 seconds.
  5. Edit: Use Canva or Photoshop to add text or refine details.
  6. Export: Save as PNG or MP4 for social media.

Pro Tip: Test prompts on multiple tools to compare results.


Common Mistakes to Avoid

  • Vague Prompts: Be specific, e.g., “cyberpunk city, neon lights, night” instead of “futuristic city.”
  • Ignoring Limits: Track daily credits (e.g., DALL-E 3’s 15 boosts) to avoid slowdowns.
  • Skipping Negative Prompts: Use them in Stable Diffusion or Craiyon to exclude unwanted elements.
  • Overlooking Editing: AI images often need post-editing in Canva or Photoshop for polish.

Learning More About Free Midjourney Alternatives

Improve your skills with these resources:

  • Tutorials: YouTube channels like Video Copilot or Reddit’s r/StableDiffusion for tool-specific guides.
  • Communities: Join X or Reddit (r/StableDiffusion) for prompt ideas and tips.
  • Courses: Skillshare offers AI art classes for beginners.
  • Practice: Generate one image daily to refine prompt-writing skills.

Why Free Midjourney Alternatives Are Hot in 2025

As of July 2025, AI image generation is booming, with free tools like Stable Diffusion and DALL-E 3 rivaling Midjourney’s quality. X posts highlight user excitement for free options like Playground AI and Craiyon, citing their accessibility and creative freedom. With the AI design market growing (valued at $150.2 billion in 2023), free alternatives make professional-grade art accessible to all.


Conclusion

Free Midjourney alternatives like Stable Diffusion, DALL-E 3, Playground AI, Adobe Firefly, and Craiyon offer powerful AI image generation without the $10/month cost. Whether you need photorealistic posters, anime characters, or quick logos, these tools deliver stunning results for beginners and pros alike. Start with Playground AI for ease, Stable Diffusion for customization, or DALL-E 3 for polished visuals. Experiment with these free Midjourney alternatives to find your perfect fit and transform your creative workflow. To learn more about graphic designing practically join our institute YourPaathshaala in raipur or contact us at 8305209520 for more information.

Midjourney vs Stable Diffusion Comparisons: Which AI Art Tool Is Best for You? - Graphics Designing Classes in Raipur.

Midjourney vs Stable Diffusion Comparisons: Which AI Art Tool Is Best for You?

Midjourney vs Stable Diffusion Comparisons: Which AI Art Tool Is Best for You? - Graphics Designing Classes in Raipur.

AI image generators are transforming graphic design, and two tools lead the pack: Midjourney and Stable Diffusion. Whether you’re creating stunning social media graphics, logos, or concept art, choosing the right tool can make or break your workflow. Midjourney vs Stable Diffusion comparisons often highlight their unique strengths—Midjourney’s ease of use and polished visuals versus Stable Diffusion’s flexibility and open-source nature. This beginner-friendly guide breaks down their differences in accessibility, customization, cost, and output quality to help you decide which fits your creative needs. Let’s dive into Midjourney vs Stable Diffusion comparisons and find your perfect AI art tool!


What Are Midjourney and Stable Diffusion?

Midjourney and Stable Diffusion are AI-powered text-to-image generators that create visuals from text prompts. They use advanced machine learning (diffusion models) to turn descriptions like “futuristic city at sunset” into detailed images. Here’s a quick overview:

  • Midjourney: A proprietary tool accessed via Discord or its web app, known for high-quality, artistic images with minimal effort. It’s subscription-based and user-friendly.
  • Stable Diffusion: An open-source model available on platforms like DreamStudio or locally on your PC. It offers extensive customization but requires more technical know-how.

This guide will compare these tools to help you choose the best for your graphic design workflow.


Why Midjourney vs Stable Diffusion Comparisons Matter

Understanding Midjourney vs Stable Diffusion comparisons is key to picking the right tool for your projects. Each excels in different areas:

  • Ease of Use: Midjourney is beginner-friendly; Stable Diffusion needs setup and learning.
  • Customization: Stable Diffusion offers more control; Midjourney keeps it simple.
  • Cost: Stable Diffusion has free options; Midjourney requires a paid subscription.
  • Output Quality: Midjourney delivers polished results; Stable Diffusion matches with tweaking.

Whether you’re a beginner creating social media posts or a pro designing detailed artwork, these comparisons will guide your choice.


Midjourney vs Stable Diffusion Comparisons: Key Factors

Let’s break down Midjourney vs Stable Diffusion comparisons across four key areas: accessibility, customization, cost, and output quality.

1. Accessibility: How Easy Is It to Get Started?

Midjourney

  • Platform: Accessed via Discord or a new web app (as of 2025), requiring an internet connection.
  • Setup: Sign up for Discord, join the Midjourney server, and use the “/imagine” command to generate images. No local installation needed.
  • Ease of Use: Intuitive for beginners, with a simple interface and community support on Discord. Ideal for those who want quick results without technical setup.
  • Drawback: Requires an internet connection and Discord familiarity, which may feel clunky for non-Discord users.

Stable Diffusion

  • Platform: Available online (e.g., DreamStudio, Hugging Face) or locally on a PC with at least 4GB VRAM. Can be used offline with local setup.
  • Setup: Online versions are simple, but local installation requires technical steps like configuring Python and a GPU.
  • Ease of Use: Steeper learning curve, especially for local use. User-friendly interfaces like DreamStudio make it accessible, but advanced features need learning.
  • Drawback: Setup complexity can deter beginners, but open-source access offers flexibility.

Verdict: Midjourney wins for ease of access and quick setup, especially for beginners. Stable Diffusion is better for those comfortable with technical setups or needing offline use.

2. Customization: How Much Control Do You Have?

Midjourney

  • Options: Limited customization, including aspect ratios, model versions (v1-v6), and stylization parameters like “–niji” for anime styles.
  • Features: Supports outpainting, inpainting, and blending images, but lacks advanced editing like Stable Diffusion’s inpainting precision.
  • Style Consistency: New 2024 features (sref, cref parameters) improve character and style consistency for projects like comics.
  • Drawback: Less control over fine details, making it less ideal for highly specific designs.

Stable Diffusion

  • Options: Extensive customization, including image size, prompt strength, seed values, sampling methods, and thousands of community models for unique styles.
  • Features: Advanced editing like inpainting (editing parts of an image), outpainting (extending images), and negative prompts to exclude unwanted elements.
  • Style Consistency: Tools like Neural Frames allow training custom models for consistent styles, ideal for sequential art.
  • Drawback: Requires prompt engineering and technical knowledge to achieve optimal results.

Verdict: Stable Diffusion wins for customization, offering unmatched control for detailed projects. Midjourney is simpler but less flexible.

3. Cost: What’s the Price Tag?

Midjourney

  • Pricing: Subscription-based, starting at $10/month for ~3.3 GPU hours, up to $96/month for 60 GPU hours (annual plans offer discounts). No free tier beyond a limited trial.
  • Trial: Offers a short trial (~25 minutes of generation time), but full access requires payment.
  • Value: Predictable costs with no hardware investment, ideal for users without powerful PCs.
  • Drawback: Ongoing subscription costs add up, especially for heavy users.

Stable Diffusion

  • Pricing: Free for local use or basic online versions (e.g., 10 images/day). Paid plans (e.g., DreamStudio) start at $14/month for 4,000 images.
  • Trial: Free access for non-commercial use via local installation or limited online trials.
  • Value: Cost-effective for users with compatible hardware; cloud options are affordable for casual users.
  • Drawback: Local setup may require a powerful GPU, adding hardware costs.

Verdict: Stable Diffusion wins for cost, with free options and affordable plans. Midjourney’s subscriptions are pricier but include server access.

4. Output Quality: Which Produces Better Images?

Midjourney

  • Style: Known for high-contrast, detailed, and realistic illustrations with a polished, artistic flair. Excels in fantasy, sci-fi, and cinematic styles.
  • Prompt Accuracy: Matches prompts well with minimal tweaking, producing vibrant, professional images.
  • Examples: A prompt like “impressionist painting of a forest” yields detailed, painterly results with rich colors.
  • Drawback: Can add modern elements (e.g., makeup in historical scenes) that feel out of place.

Stable Diffusion

  • Style: Offers diverse styles, from photorealistic to abstract, depending on the model used. Requires prompt tuning for optimal results.
  • Prompt Accuracy: Matches prompts with tweaking; excels in ultra-realistic or custom styles with tools like LoRA or ControlNet.
  • Examples: The same “impressionist painting” prompt may need specific models (e.g., Stable Diffusion Ultra) to rival Midjourney’s polish.
  • Drawback: Default outputs may lack Midjourney’s flair without fine-tuning.

Verdict: Midjourney wins for out-of-the-box quality; Stable Diffusion matches or exceeds it with expertise and custom models.


Step-by-Step Workflow: Creating a Social Media Graphic

Here’s a beginner-friendly workflow comparing Midjourney and Stable Diffusion for a social media graphic (e.g., Instagram post for a coffee shop).

Midjourney Workflow

  1. Join Midjourney: Sign up for Discord and join the Midjourney server.
  2. Enter Prompt: Type “/imagine vintage coffee shop poster, warm tones, cozy vibe –ar 1:1” in a private Discord channel.
  3. Generate Images: Receive four images in ~1 minute. Select the best and upscale using “–v 6” for higher quality.
  4. Edit: Use Canva to add text like “Grand Opening!” and adjust colors.
  5. Export: Save as PNG for Instagram.

Time: ~10 minutes
Pros: Fast, polished results with minimal effort.
Cons: Limited editing options within Midjourney.

Stable Diffusion Workflow

  1. Access Platform: Use DreamStudio or install locally via AUTOMATIC1111.
  2. Enter Prompt: Input “vintage coffee shop poster, warm tones, cozy vibe, high detail” with settings (e.g., 512×512, 30 steps).
  3. Generate Images: Get two images (DreamStudio) or more (local). Tweak with negative prompts (e.g., “avoid blurry text”).
  4. Edit: Use inpainting to refine details or Canva for text overlays.
  5. Export: Save as PNG for Instagram.

Time: ~15-20 minutes
Pros: High control over details and styles.
Cons: Requires more setup and prompt tweaking.

Verdict: Midjourney is faster for beginners; Stable Diffusion offers more control for custom designs.


Midjourney vs Stable Diffusion for Different Use Cases

1. Social Media Graphics

  • Midjourney: Best for quick, eye-catching posts with minimal effort. Ideal for Instagram or TikTok.
  • Stable Diffusion: Great for tailored visuals with specific branding needs, like product ads.

2. Concept Art

  • Midjourney: Excels in fantasy/sci-fi environments with cinematic quality.
  • Stable Diffusion: Better for ultra-realistic or niche styles with custom models.

3. Branding and Logos

  • Midjourney: Good for artistic logo concepts but limited for precise edits.
  • Stable Diffusion: Ideal for iterative logo design with inpainting/outpainting.

Common Mistakes to Avoid

  • Midjourney: Vague prompts lead to inconsistent results. Be specific, e.g., “cyberpunk city, neon lights, night” instead of “futuristic city.”
  • Stable Diffusion: Skipping model selection or negative prompts can result in low-quality outputs. Use community models for better results.
  • Both: Ignoring platform-specific guidelines (e.g., Midjourney’s censorship on explicit content) can limit usability.

Tools and Resources

  • Midjourney: Discord, Midjourney web app, Canva for post-editing.
  • Stable Diffusion: DreamStudio, AUTOMATIC1111, Hugging Face, Neural Frames for style consistency.
  • Learning: YouTube channels like Video Copilot, Reddit’s r/StableDiffusion, or PAACADEMY’s AI workshops.

Why Midjourney vs Stable Diffusion Comparisons Matter in 2025

As of July 2025, AI art tools are central to graphic design. Midjourney’s web app and V6 model make it more accessible, while Stable Diffusion’s open-source community drives innovation with tools like Stable Diffusion 3. X posts note Stable Diffusion’s edge in fine details and pose control, but Midjourney’s polished visuals remain a favorite for quick results. With AI design markets growing (valued at $150.2 billion in 2023), choosing the right tool is key.


Conclusion

Midjourney vs Stable Diffusion comparisons reveal two powerful AI art tools with distinct strengths. Midjourney shines for beginners seeking fast, high-quality visuals with minimal effort, perfect for social media or artistic projects. Stable Diffusion excels for advanced users needing customization and flexibility, ideal for detailed designs or branding. Your choice depends on your skill level, budget, and project needs. Try Midjourney’s trial for quick results or Stable Diffusion’s free version to experiment. Start creating today and see which tool sparks your creativity! To learn more about graphic designing practically join our institute YourPaathshaala in raipur or contact us at 8305209520 for more information.
What is AI Graphic Design Workflows for beginners? - Graphics Designing Course in Raipur.

AI Graphic Design Workflows and Tutorials: Streamline Your Creative Process

What is AI Graphic Design Workflows for beginners? - Graphics Designing Course in Raipur.

Artificial Intelligence (AI) is revolutionizing graphic design, making it faster and easier to create stunning visuals. From generating logos to automating repetitive tasks, AI graphic design workflows and tutorials help beginners and pros alike streamline their creative process. Whether you’re designing social media posts, branding materials, or motion graphics, AI tools like Canva, Midjourney, and Adobe Firefly can save time and spark inspiration. This beginner-friendly guide explores how to integrate AI into your design workflow and provides simple tutorials to get you started. Let’s dive into AI graphic design workflows and tutorials to elevate your creative game!


What Are AI Graphic Design Workflows and Tutorials?

AI graphic design workflows are step-by-step processes that use AI tools to create, edit, or enhance visual content. These workflows automate tasks like background removal, color palette generation, or layout design, allowing designers to focus on creativity. Tutorials are guides that teach you how to use these AI tools effectively, often with practical examples or prompts. For instance, you might use Midjourney to generate a logo from a text prompt or Canva’s AI to resize designs for social media. AI graphic design workflows and tutorials make professional-quality design accessible, even if you’re new to the field.

This guide will walk you through workflows and tutorials to master AI-driven design.


Why AI Graphic Design Workflows and Tutorials Matter

AI is transforming graphic design by saving time and boosting creativity. Here’s why AI graphic design workflows and tutorials are essential:

  • Saves Time: Automate repetitive tasks like resizing images or removing backgrounds.
  • Boosts Creativity: AI suggests design ideas, color schemes, or layouts to spark inspiration.
  • Accessible for All: Beginners can create professional designs without years of experience.
  • Improves Efficiency: Streamline workflows for faster project delivery.
  • Enhances Personalization: AI analyzes data to create tailored designs for specific audiences.

Whether you’re a freelancer, marketer, or small business owner, AI graphic design workflows and tutorials help you work smarter.


The Building Blocks of AI Graphic Design Workflows

To create effective AI-driven designs, you need to understand three key components: automation, ideation, and collaboration. Let’s break them down.

1. Automation: Speed Up Repetitive Tasks

AI excels at handling time-consuming tasks, freeing you to focus on creative work. Here’s how automation works in AI graphic design workflows:

  • Background Removal: Tools like Remove.bg or Recraft remove backgrounds in one click.
  • Image Upscaling: Let’s Enhance boosts low-res images without losing quality.
  • Layout Adjustments: Adobe Sensei auto-reframes designs for different platforms.
  • Font Pairing: Fontjoy suggests font combinations for headers and body text.

Pro Tip: Use automation for repetitive tasks to save hours on each project.

2. Ideation: Spark Creative Ideas

AI tools generate design ideas to overcome creative blocks. Here’s how they help:

  • Text-to-Image: Midjourney and DALL-E create visuals from text prompts, like “vintage logo for a coffee shop.”
  • Color Palettes: Khroma generates personalized color schemes based on your preferences.
  • Templates: Canva’s AI suggests layouts for social media or flyers.
  • Concept Exploration: Use ChatGPT to brainstorm design ideas or campaign themes.

Pro Tip: Experiment with AI prompts to discover unique design styles.

3. Collaboration: Streamline Teamwork

AI enhances team workflows by improving feedback and consistency. Here’s how:

  • Feedback Tools: Artwork Flow allows real-time comments and annotations.
  • Brand Consistency: Recraft’s AI ensures designs align with brand styles.
  • Project Management: ClickUp automates design project tracking and feedback.
  • Real-Time Edits: Tools like Kittl enable instant team feedback.

Pro Tip: Use AI collaboration tools to keep remote teams aligned.


Step-by-Step AI Graphic Design Workflow

Here’s a simple workflow to create a social media post using AI tools, perfect for beginners.

Step 1: Plan Your Design

Define your project’s goal and audience. Ask yourself:

  • What’s the Purpose? E.g., promote a sale or share a tip.
  • Who’s the Audience? E.g., young adults for Instagram or professionals for LinkedIn.
  • What’s the Style? E.g., bold and colorful or clean and minimal.

Write a brief, like: “Create a vibrant Instagram post for a summer sale.”

Step 2: Generate Visuals with AI

Use AI tools to create or enhance visuals:

  • Image Generation: In Midjourney, enter a prompt like “bright summer sale poster, tropical vibe” to generate an image.
  • Background Removal: Upload a product photo to Remove.bg to isolate the subject.
  • Upscaling: Use Let’s Enhance to improve image quality for print or digital.

Pro Tip: Save generated images to reuse across projects.

Step 3: Design with AI Tools

Choose a design platform to create your layout:

  • Canva: Use Canva’s AI to select a template and customize with your image and text.
  • Adobe Express: Apply AI-powered text effects or auto-resize for Instagram.
  • Figma: Use AI plugins like smart selection for collaborative design.

Add text, colors, and fonts that match your brand.

Step 4: Add Motion or Text

Enhance your design with dynamic elements:

  • Motion Text: Use Adobe After Effects or CapCut to add animated text overlays.
  • Lower Thirds: Create name graphics in Canva for a professional look.
  • Sync to Audio: Time text animations to music beats using CapCut’s beat detection.

Pro Tip: Keep animations short (1-2 seconds) for impact.

Step 5: Review and Export

Polish and share your design:

  • Get Feedback: Share with your team via Artwork Flow or ClickUp for comments.
  • Check Quality: Ensure text is readable and images are high-res on mobile.
  • Export: Save as PNG or MP4 in 1080p for social media platforms.

Pro Tip: Test your design on a phone to confirm it looks great.


Beginner-Friendly AI Graphic Design Tutorials

Here are three simple tutorials to get you started with AI graphic design workflows and tutorials.

Tutorial 1: Create a Logo with Midjourney

Goal: Design a logo for a fictional coffee shop.

  1. Open Midjourney: Access via Discord or its platform.
  2. Enter a Prompt: Type “/imagine vintage coffee shop logo, minimalist, brown and cream tones –ar 1:1” and generate.
  3. Refine Results: Select the best logo and use “Remix Mode” to tweak details, like “add a coffee cup icon.”
  4. Vectorize: Upload to Recraft’s vectorizer for a scalable SVG file.
  5. Export: Download and use in Canva for further tweaks.

Time: 15 minutes
Tools: Midjourney, Recraft, Canva
Pro Tip: Experiment with prompts to get unique logo styles.

Tutorial 2: Design a Social Media Post with Canva AI

Goal: Create an Instagram post for a product launch.

  1. Open Canva: Choose a blank Instagram post template (1080×1080).
  2. Use AI Generator: Enter “modern product launch graphic, tech vibe” in Canva’s AI image generator.
  3. Customize: Add your product image (cleaned with Remove.bg) and text like “New Release Today!”
  4. Add Animation: Apply a “fade-in” text animation from Canva’s animate tool.
  5. Export: Save as PNG or MP4 and post to Instagram.

Time: 10 minutes
Tools: Canva, Remove.bg
Pro Tip: Use Canva’s Magic Resize to adapt for other platforms.

Tutorial 3: Create a Lower Third with Adobe Express

Goal: Add a professional lower third to a video.

  1. Open Adobe Express: Start a new video project.
  2. Add Text: Create a lower third with text like “Jane Doe, Designer” using a bold font.
  3. Apply AI Effects: Use Adobe Firefly for text effects, like a neon glow.
  4. Animate: Add a “slide-in” animation to the text.
  5. Export: Save as MP4 and import into your video editor.

Time: 20 minutes
Tools: Adobe Express
Pro Tip: Keep lower thirds on screen for 3-5 seconds for readability.


AI Graphic Design Workflows for Different Needs

Tailor your workflow to your project type:

1. Social Media Graphics

  • Tools: Canva, Adobe Express, Midjourney
  • Workflow: Generate images with Midjourney, clean up with Remove.bg, and design in Canva with AI templates.
  • Tips: Use vibrant colors and short text animations for engagement.

2. Branding and Logos

  • Tools: Looka, Recraft, Adobe Sensei
  • Workflow: Generate logo concepts with Looka, vectorize with Recraft, and refine in Adobe Illustrator.
  • Tips: Ensure logo variations align with brand colors.

3. Motion Graphics

  • Tools: Adobe After Effects, CapCut
  • Workflow: Create static designs in Canva, then animate text in After Effects or CapCut.
  • Tips: Sync animations to music beats for impact.

Common AI Graphic Design Workflow Mistakes to Avoid

Steer clear of these pitfalls:

  • Vague Prompts: Unclear prompts in Midjourney or DALL-E lead to poor results. Be specific, e.g., “modern logo, blue tones, tech theme.”
  • Over-Reliance on AI: AI can’t replace human creativity. Use it as a starting point, not the final product.
  • Ignoring Ethics: Check for copyright issues with AI-generated content. Use tools with clear licensing, like Adobe Firefly.
  • Poor Integration: Ensure AI tools work with your existing software (e.g., Figma plugins).

Tools for AI Graphic Design Workflows and Tutorials

Start with these beginner-friendly tools:

  • Canva: AI-powered templates and image generation. Free tier available.
  • Midjourney: Text-to-image generator for unique visuals. Subscription-based.
  • Remove.bg: One-click background removal. Free and paid plans.
  • Adobe Express: AI text effects and resizing. Part of Creative Cloud.
  • Recraft: Vectorization and brand consistency tools. Free and paid plans.

Learning More About AI Graphic Design Workflows and Tutorials

Level up your skills with these resources:

  • Courses: Designlab’s AI for Visual Design or ELVTR’s AI-Aided Graphic Design (covers Midjourney and Figma).
  • YouTube Channels: Watch tutorials on channels like Video Copilot or Will Paterson for AI design tips.
  • Communities: Join Reddit’s r/GraphicDesign or X for AI workflow ideas.
  • Practice: Create one AI-assisted design weekly to test new tools.

Why AI Graphic Design Workflows and Tutorials Rock in 2025

As of July 2025, AI is a game-changer for graphic design. Tools like Canva and Midjourney make professional design accessible, while Adobe Sensei automates complex tasks. A 2024 survey found 98% of U.S. graphic designers use AI daily, citing time savings and efficiency. With AI tools evolving, tutorials on platforms like Designlab and X posts from creators like @BrettFromDJ help beginners stay ahead. AI graphic design workflows and tutorials are your ticket to faster, more creative designs.


Conclusion

AI graphic design workflows and tutorials empower anyone to create stunning visuals with ease. By automating repetitive tasks, sparking ideas, and streamlining collaboration, AI tools like Canva, Midjourney, and Adobe Express make design accessible and efficient. Start with the tutorials in this guide, experiment with prompts, and integrate AI into your workflow. Whether you’re crafting social media posts or logos, AI graphic design workflows and tutorials will help you save time and unleash your creativity.

Ready to design like a pro? Try a tutorial today and transform your workflow! To learn more about graphic designing practically join our institute YourPaathshaala in raipur or contact us at 8305209520 for more information.
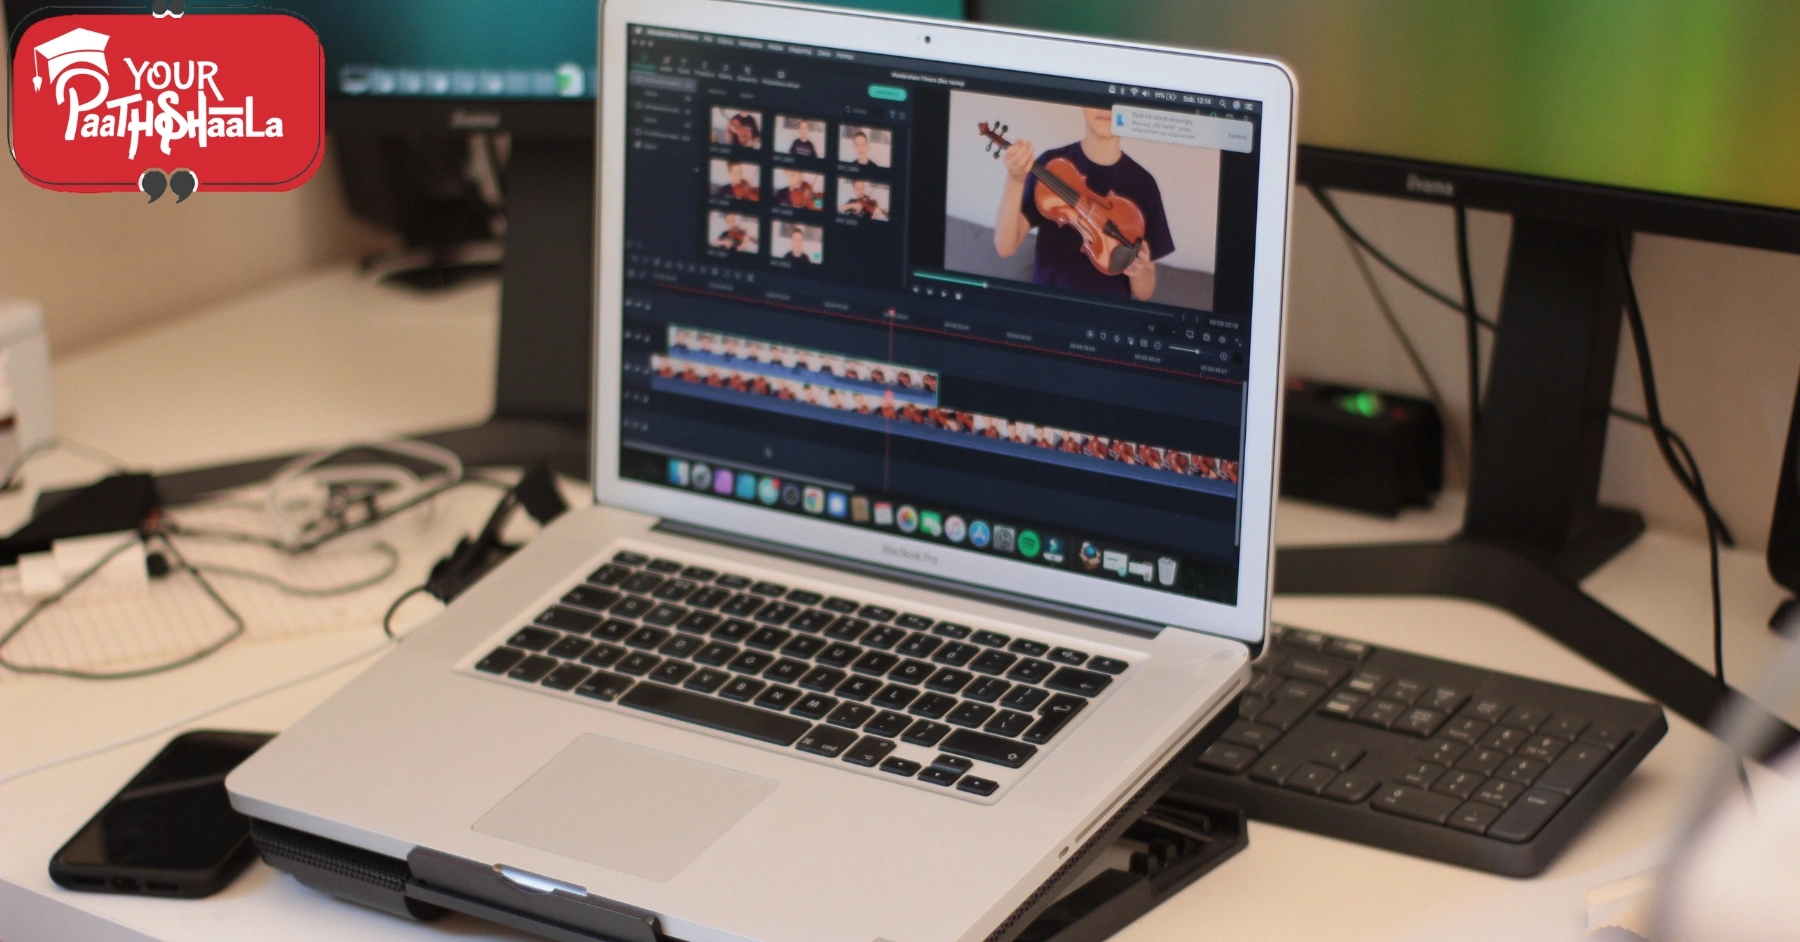
Motion Text & Lower Thirds: Add Professional Flair to Your Videos - Graphics Designing Course in Raipur.

Motion Text & Lower Thirds: Add Professional Flair to Your Videos

Motion Text & Lower Thirds: Add Professional Flair to Your Videos - Graphics Designing Course in Raipur.

Want your videos to look like they belong on TV? Motion text & lower thirds are the secret to giving your content a polished, professional edge. These dynamic text overlays, titles, and name graphics add style and clarity, making your videos stand out on YouTube, Instagram, or even corporate promos. This beginner-friendly guide walks you through how to create and animate text to achieve that broadcast-quality feel. From crafting eye-catching titles to designing sleek lower thirds, you’ll learn simple steps to elevate your videos. Let’s dive into the world of motion text & lower thirds and make your content shine!


What Are Motion Text & Lower Thirds?

Motion text & lower thirds are animated text elements that enhance your videos. Motion text includes dynamic titles, captions, or overlays that move, fade, or scale to grab attention. Lower thirds are graphics (usually at the bottom of the screen) that display names, titles, or key information, like “John Doe, CEO” in an interview. These elements are common in TV broadcasts, vlogs, and social media videos to add professionalism and context.

This guide will show you how to create motion text & lower thirds that make your videos look sharp and engaging.


Why Motion Text & Lower Thirds Matter

Adding motion text & lower thirds can transform your videos. Here’s why they’re so important:

  • Boosts Professionalism: Sleek text makes your videos look polished and broadcast-ready.
  • Clarifies Information: Lower thirds introduce people or highlight key points clearly.
  • Grabs Attention: Animated text hooks viewers, especially in fast-paced platforms like TikTok.
  • Enhances Branding: Use consistent fonts and colors to reinforce your brand.
  • Improves Accessibility: Text overlays help viewers understand content without sound.

Whether you’re a YouTuber or a business, motion text & lower thirds take your videos to the next level.


The Building Blocks of Motion Text & Lower Thirds

To create stunning text overlays, you need to understand three key elements: design, animation, and integration. Let’s break them down simply.

1. Design: Create Eye-Catching Text

The look of your text sets the tone. Here’s how to design motion text & lower thirds:

  • Choose Readable Fonts: Use bold, clear fonts like Montserrat or Roboto for easy reading.
  • Pick Brand Colors: Match text and background colors to your brand or video’s mood (e.g., blue for calm, red for energy).
  • Add Backgrounds: Place text on a semi-transparent box or shape for contrast and readability.
  • Keep It Simple: Avoid cluttered designs—stick to one or two fonts and minimal graphics.

Pro Tip: Use Adobe Fonts or Google Fonts for free, professional font options.

2. Animation: Bring Text to Life

Animation makes motion text & lower thirds dynamic. Here’s how to animate them:

  • Use Simple Motions: Try fades, slides, or zooms for smooth entrances and exits.
  • Time It Right: Make text appear when it’s relevant, like a name during an interview.
  • Keep It Short: Animations should last 1-2 seconds to avoid distracting viewers.
  • Add Easing: Use “easy ease” in editing apps for natural, smooth motion.

Pro Tip: Watch TV news or YouTube vlogs to see how pros animate their text.

3. Integration: Blend with Your Video

Text should feel like part of the video, not an afterthought. Here’s how to integrate motion text & lower thirds:

  • Match the Style: Ensure text matches your video’s vibe (e.g., playful for Reels, sleek for promos).
  • Position Wisely: Place lower thirds in the bottom third of the screen to avoid covering key visuals.
  • Sync with Audio: Time text animations to music beats or voiceovers for impact.
  • Test Readability: Ensure text is clear on small screens like phones.

Pro Tip: Preview your video with text on a phone to check size and clarity.


Step-by-Step Guide to Motion Text & Lower Thirds

Ready to add professional text to your videos? Follow these easy steps for motion text & lower thirds.

Step 1: Plan Your Text

Before you start, plan what your text will say and how it’ll look. Ask yourself:

  • What’s the Purpose? Are you introducing a person, highlighting a tip, or adding a title?
  • What’s the Style? Playful for social media or formal for corporate videos?
  • Where Will It Go? Decide if it’s a title at the start or a lower third during a scene.

Write down the text (e.g., “Sarah Lee, Travel Vlogger”) and sketch where it’ll appear.

Step 2: Choose Your Tools

You don’t need expensive software to create motion text & lower thirds. Here are beginner-friendly options:

  • Free Apps: CapCut, Canva, or VN Video Editor offer built-in text tools.
  • Pro Software: Adobe After Effects or Premiere Pro for advanced animations.
  • Templates: Use pre-made templates from Envato Elements or Motion Array for quick results.

Pro Tip: Start with free apps to learn the basics before moving to pro tools.

Step 3: Design Your Text

Create your text and lower thirds in your chosen app:

  • Add Text: Use the text tool to type your title or lower third (e.g., “New Product Launch”).
  • Customize Fonts: Choose a bold, readable font and adjust size for clarity.
  • Add Graphics: Include a shape or bar behind the text for a polished look.
  • Set Colors: Use contrasting colors (e.g., white text on a dark box) for readability.

Pro Tip: Save your design as a template to reuse across videos for consistency.

Step 4: Animate Your Text

Bring your text to life with animation:

  • Choose an Animation: In your app, select a preset like “Fade In” or “Slide Left.”
  • Use Keyframes (Pro Tools): In After Effects or Premiere, add keyframes to animate position, scale, or opacity.
  • Time It: Make text appear for 3-5 seconds, synced with key video moments or audio beats.
  • Add Easing: Smooth out animations with “easy ease” for a natural feel.

Pro Tip: Keep animations subtle to avoid overwhelming viewers.

Step 5: Integrate and Export

Make sure your text fits seamlessly into your video:

  • Place Text: Position lower thirds in the bottom left or right corner. Place titles center-screen or at the top.
  • Sync with Video: Align text animations with cuts, music beats, or voiceovers.
  • Check Readability: Ensure text is clear on small screens and doesn’t block key visuals.
  • Export: Use H.264 format with 1080p resolution for platforms like YouTube or Instagram.

Pro Tip: Test your video on a phone to confirm text looks great on mobile.


Motion Text & Lower Thirds for Different Platforms

Each platform has unique text needs. Here’s how to adapt:

1. Instagram Reels and TikTok

  • Length: Text appears for 1-3 seconds.
  • Style: Bold, colorful fonts with quick animations (e.g., pop-in or zoom).
  • Placement: Center or top for captions, bottom for lower thirds.
  • Animation: Fast and playful to match the platform’s energy.

2. YouTube Videos

  • Length: Text stays on screen for 3-5 seconds.
  • Style: Clean, readable fonts with subtle animations (e.g., fade or slide).
  • Placement: Lower thirds for names, center for titles or end screens.
  • Animation: Smooth and professional to suit longer content.

3. Corporate or Promotional Videos

  • Length: Text on screen for 4-6 seconds.
  • Style: Sleek fonts with branded colors and minimal graphics.
  • Placement: Lower thirds for names/titles, center for intros or promos.
  • Animation: Subtle fades or slides for a polished look.

Common Motion Text & Lower Thirds Mistakes to Avoid

Avoid these pitfalls for better text:

  • Cluttered Designs: Too many fonts or colors look messy. Stick to simple designs.
  • Hard-to-Read Text: Small or low-contrast text is tough to read on phones.
  • Overdone Animations: Flashy effects can distract from your video’s message.
  • Bad Timing: Text that appears too early or late feels off. Sync it carefully.

Tools for Motion Text & Lower Thirds

You don’t need pro gear to create great text. Try these:

  • Editing Apps: Free tools like CapCut, Canva, or VN Video Editor; pro tools like Adobe After Effects or Premiere Pro.
  • Templates: Find pre-made lower thirds on Envato Elements, Motion Array, or Canva.
  • Fonts: Use free fonts from Google Fonts or Adobe Fonts for professional looks.
  • Stock Graphics: Get free shapes or icons from Pexels or Flaticon to enhance designs.

Learning More About Motion Text & Lower Thirds

Improve your text skills with these resources:

  • YouTube Channels: Watch Video Copilot or Motion Array for text animation tutorials.
  • Online Courses: Skillshare and Udemy offer classes on After Effects and text design.
  • Communities: Join Reddit’s r/AfterEffects or r/VideoEditing for tips.
  • Practice: Create short videos with different text styles weekly to experiment.

Why Motion Text & Lower Thirds Rock in 2025

As of July 2025, motion text & lower thirds are key to standing out in a crowded video landscape. With short-form content dominating platforms like TikTok and YouTube Shorts, dynamic text grabs attention fast. AI tools in apps like Adobe After Effects (e.g., auto-text animation) and CapCut make creating motion text & lower thirds easier than ever, even for beginners. By adding professional text, you can make your videos look broadcast-ready.


Conclusion

Motion text & lower thirds are your ticket to creating videos with a professional, broadcast feel. By designing clear text, adding smooth animations, and syncing them with your video, you can captivate audiences on any platform. Whether you’re making Reels, YouTube videos, or promos, start with free tools, experiment with animations, and keep it simple. With these tips, you’ll master motion text & lower thirds in no time.

Ready to make your videos pop? Open your editing app and start designing! To learn more about graphic designing practically join our institute YourPaathshaala in raipur or contact us at 8305209520 for more information.
Sound Syncing & Background Music: Create Emotional Videos with Perfect Audio - YourPaathshaala Graphic Design/Video Editing Course in Raipur.

Sound Syncing & Background Music: Create Emotional Videos with Perfect Audio

Sound Syncing & Background Music: Create Emotional Videos with Perfect Audio - YourPaathshaala Graphic Design/Video Editing Course in Raipur.

Audio is the secret sauce that makes videos pop. Whether you’re creating a heart-pounding action clip, a touching vlog, or a slick ad, sound syncing & background music bring your visuals to life. By perfectly timing voiceovers, sound effects, and music tracks, you can add emotion, energy, and polish to any video. This beginner-friendly guide breaks down how to sync audio with video and choose the right background music to captivate your audience. From YouTube to TikTok, you’ll learn simple steps to make your videos sound as good as they look. Let’s dive into sound syncing & background music!


What Is Sound Syncing & Background Music?

Sound syncing & background music involve aligning audio elements—like voiceovers, sound effects, and music tracks—with your video to create a seamless, engaging experience. Syncing means timing audio to match specific moments, like a beat drop with a scene change or a sound effect with an action. Background music sets the mood, adding energy or emotion to your story. Whether you’re making a short Instagram Reel or a long YouTube tutorial, great audio makes your video feel professional and keeps viewers hooked.

This guide will show you how to master audio syncing and choose music that elevates your content.


Why Sound Syncing & Background Music Matter

Good audio can make or break a video. Here’s why sound syncing & background music are so important:

  • Boosts Engagement: Well-timed audio keeps viewers watching longer.
  • Sets the Mood: Music and sound effects evoke emotions, like excitement or nostalgia.
  • Enhances Storytelling: Audio guides the audience through your video’s story.
  • Feels Professional: Clean, synced audio makes your content polished.
  • Works Across Platforms: From TikTok to corporate videos, great audio is universal.

Mastering sound syncing & background music helps your videos stand out in a crowded digital world.


The Building Blocks of Sound Syncing & Background Music

To create awesome videos, you need to master three audio elements: voiceovers, sound effects, and background music. Let’s break them down simply.

1. Voiceovers: Tell Your Story

Voiceovers add narration or personality to your video. They’re great for explaining ideas or guiding viewers. Here’s how to use them in sound syncing & background music:

  • Record Clearly: Use a good microphone (even a phone mic works in a quiet room).
  • Speak Naturally: Talk like you’re chatting with a friend to keep it engaging.
  • Time It Right: Sync your voiceover to match key moments, like a product reveal.
  • Keep It Short: For short-form videos, use quick, punchy voiceovers.

Pro Tip: Practice your script a few times to sound confident and clear.

2. Sound Effects: Add Impact

Sound effects (SFX) bring actions to life, like a door slam or a crowd cheer. They make your video feel real. Here’s how to use them:

  • Choose Relevant SFX: Pick sounds that match the action, like a “whoosh” for a fast transition.
  • Time Precisely: Align effects with specific moments, like a “ding” when text appears.
  • Don’t Overdo It: Too many effects can feel chaotic. Use them sparingly.
  • Find Free SFX: Check sites like Freesound.org or your editing app’s library.

Pro Tip: Test effects with headphones to ensure they sound crisp.

3. Background Music: Set the Vibe

Background music creates the emotional tone of your video. Here’s how to choose and use it in sound syncing & background music:

  • Match the Mood: Pick upbeat tracks for fun videos or soft music for emotional ones.
  • Use Royalty-Free Music: Find tracks on YouTube Audio Library, Epidemic Sound, or Artlist.
  • Sync to Beats: Time cuts or transitions to the music’s rhythm for a polished feel.
  • Adjust Volume: Keep music lower than voiceovers or SFX so it doesn’t overpower.

Pro Tip: Save favorite tracks to reuse across projects for consistency.


Step-by-Step Guide to Sound Syncing & Background Music

Ready to make your video sound amazing? Follow these simple steps for sound syncing & background music.

Step 1: Plan Your Audio

Before you start, plan your audio to match your video’s story. Ask yourself:

  • What’s the Goal? Are you creating a fun Reel, a tutorial, or an emotional ad?
  • What’s the Mood? Decide if you need energetic, calm, or dramatic audio.
  • What Audio Elements? Will you use a voiceover, SFX, music, or all three?

Write a quick script for voiceovers and note where SFX or music beats should hit.

Step 2: Record or Gather Audio

Collect the audio you’ll need:

  • Voiceovers: Record in a quiet space with a mic (e.g., phone or USB mic like Blue Yeti). Read your script naturally.
  • Sound Effects: Download SFX from free libraries like Freesound or your editing app.
  • Background Music: Choose royalty-free tracks from YouTube Audio Library, Pixabay, or paid platforms like Epidemic Sound.

Pro Tip: Always test audio quality with headphones before editing.

Step 3: Shoot or Gather Video

Your video is the foundation for syncing. Here’s how to prepare:

  • Shoot Footage: Use a smartphone or camera. Record in 1080p or 4K for quality.
  • Plan for Syncing: Film specific actions (e.g., a door closing) to match with SFX.
  • Get B-Roll: Extra footage gives you flexibility when syncing audio.

Pro Tip: Mark key moments (e.g., a clap) to make syncing easier in editing.

Step 4: Edit and Sync Audio

Use editing software like CapCut (free), Adobe Premiere Pro, or DaVinci Resolve. Here’s how to sync audio for sound syncing & background music:

  • Import Assets: Load your video, voiceover, SFX, and music into the timeline.
  • Sync Voiceovers: Align voiceover audio with visuals, like matching narration to a product shot.
  • Add Sound Effects: Place SFX precisely, like a “boom” when an object hits the ground.
  • Sync Music: Line up music beats with cuts or transitions. Zoom into the audio waveform to match timing exactly.
  • Balance Levels: Adjust volumes so voiceovers are clear, SFX are punchy, and music is subtle.

Pro Tip: Use markers in your editing app to flag key sync points.

Step 5: Polish and Export

Make your audio shine and share your video:

  • Check Syncing: Play the video to ensure audio matches visuals perfectly.
  • Adjust Audio Effects: Add EQ or reverb to voiceovers for clarity (available in most editing apps).
  • Export Settings: Use H.264 format with 1080p resolution for platforms like YouTube or Instagram.
  • Test on Devices: Watch on a phone or laptop to confirm audio sounds great.

Pro Tip: Add captions for accessibility, as many viewers watch without sound.


Sound Syncing & Background Music for Different Platforms

Each platform has unique audio needs. Here’s how to adapt:

1. Instagram Reels and TikTok

  • Length: 15-60 seconds.
  • Audio: Use trending music or viral sounds from the platform’s library.
  • Syncing: Time cuts and SFX to music beats for high energy.
  • Voiceovers: Keep them short and punchy, or rely on text overlays.

2. YouTube Shorts

  • Length: Up to 60 seconds.
  • Audio: Mix trending music with voiceovers for tutorials or stories.
  • Syncing: Align SFX and cuts to keep the pace fast but clear.
  • Background Music: Choose music that supports the video’s tone without overpowering.

3. Promotional Videos

  • Length: 30-90 seconds.
  • Audio: Use professional voiceovers and subtle, upbeat music.
  • Syncing: Match SFX to product actions (e.g., a click for a button press).
  • Background Music: Pick clean, royalty-free tracks that feel polished.

Common Sound Syncing & Background Music Mistakes to Avoid

Avoid these pitfalls for better audio:

  • Poor Syncing: Misaligned audio (e.g., a sound effect too early) feels sloppy. Zoom into the timeline for precision.
  • Loud Music: If music drowns out voiceovers or SFX, viewers get frustrated.
  • Low-Quality Audio: Muffled voiceovers or cheap SFX hurt professionalism.
  • Ignoring Trends: For Reels or TikTok, skipping trending sounds limits reach.

Tools for Sound Syncing & Background Music

You don’t need fancy gear to create great audio. Try these:

  • Microphones: Use a smartphone or a budget mic like the Boya BY-M1 for voiceovers.
  • Editing Software: Free apps like CapCut or iMovie; pro tools like Adobe Premiere Pro or Audacity for audio.
  • Audio Libraries: Find free music and SFX on YouTube Audio Library, Freesound, or Pixabay.
  • Syncing Tools: Use waveform views in editing apps to align audio precisely.

Learning More About Sound Syncing & Background Music

Improve your audio skills with these resources:

  • YouTube Channels: Watch creators like Premiere Basics or Cinecom for audio tips.
  • Online Courses: Skillshare and Udemy offer classes on video audio editing.
  • Communities: Join Reddit’s r/VideoEditing or r/AudioPost for advice.
  • Practice: Experiment with syncing audio in short weekly projects.

Why Sound Syncing & Background Music Rocks in 2025

As of July 2025, audio is more critical than ever. Short-form platforms like TikTok and Instagram Reels rely on trending sounds to boost visibility. AI tools in editing apps, like Adobe’s auto-sync or CapCut’s beat detection, make sound syncing & background music easier for beginners. By nailing your audio, you can create videos that resonate emotionally and keep viewers coming back.


Conclusion

Sound syncing & background music are the keys to making videos that grab attention and stir emotions. By syncing voiceovers, sound effects, and music tracks with your visuals, you can create content that feels alive and professional. Whether you’re crafting a TikTok clip or a promotional video, start with a plan, use free tools, and practice syncing to the beat. With these tips, you’ll master sound syncing & background music in no time.

Ready to make your videos sound amazing? Grab a mic, pick a track, and start syncing! To learn more about graphic designing practically join our institute YourPaathshaala in raipur or contact us at 8305209520

Reels & Short Video Creation: Craft Viral Content for Instagram, YouTube, and More - Best Graphic Design learnig course in Raipur.

Reels & Short Video Creation: Craft Viral Content for Instagram, YouTube, and More

Reels & Short Video Creation: Craft Viral Content for Instagram, YouTube, and More - Best Graphic Design learnig course in Raipur.

Short-form videos are taking over the internet, and platforms like Instagram Reels, YouTube Shorts, and TikTok are leading the charge. These quick, vertical videos grab attention in seconds, making them perfect for creators, brands, and businesses. Mastering Reels & short video creation lets you craft engaging content that hooks viewers and goes viral. This beginner-friendly guide breaks down everything you need to know, from planning and shooting to editing and posting. Whether you’re creating fun dance clips or slick promotional snippets, you’ll learn simple steps to make your videos stand out. Let’s dive into the world of Reels & short video creation!


What Is Reels & Short Video Creation?

Reels & short video creation is the process of making quick, vertical videos (typically 15-60 seconds) designed for platforms like Instagram Reels, YouTube Shorts, or TikTok. These videos use fast-paced visuals, catchy audio, and snappy editing to tell a story, entertain, or promote something. Think of them as mini-movies that pack a punch in a short time. Whether you’re showcasing a product, sharing a tip, or jumping on a viral trend, Reels & short video creation is all about grabbing attention and keeping it.

This guide will show you how to create scroll-stopping videos with easy-to-follow tips.


Why Reels & Short Video Creation Matters

Short-form videos are everywhere, and for good reason. Here’s why Reels & short video creation is a game-changer:

  • Instant Engagement: Short videos hook viewers in the first 3 seconds.
  • Viral Potential: Catchy content can spread like wildfire on social media.
  • Platform-Friendly: Vertical format fits perfectly on mobile screens.
  • Boosts Reach: Algorithms on Instagram and YouTube prioritize Reels and Shorts.
  • Versatile: Works for fun content, tutorials, ads, or brand promos.

Whether you’re a creator or a business, Reels & short video creation helps you connect with audiences fast.


The Building Blocks of Reels & Short Video Creation

To make awesome short videos, you need three key ingredients: visuals, audio, and editing. Let’s break them down in a simple way.

1. Visuals: Grab Attention Fast

Visuals are what people see first. In Reels & short video creation, they need to be bold and clear. Here’s how to nail your visuals:

  • Shoot Vertical: Use a 9:16 aspect ratio (1080×1920) for mobile screens.
  • Start with a Hook: Open with a striking image, like a colorful product or a funny face.
  • Keep It Bright: Use good lighting—natural light or a ring light works great.
  • Mix Shots: Combine close-ups (for details), medium shots (for action), and wide shots (for context).

Pro Tip: Film in a clutter-free space to keep the focus on your subject.

2. Audio: Set the Vibe

Audio is the heartbeat of short videos. It’s the music or sound that makes your video pop. Here’s how to use audio in Reels & short video creation:

  • Choose Trending Sounds: Use popular tracks from Instagram Reels or TikTok to boost discoverability.
  • Add Voiceovers: Record a quick, clear voiceover to explain or add personality.
  • Include Sound Effects: Small sounds, like a “whoosh” or a “ding,” add energy.
  • Balance the Mix: Make sure music isn’t too loud compared to voices or effects.

Pro Tip: Check the Instagram Reels or TikTok audio library for trending sounds to ride the algorithm wave.

3. Editing: Make It Snappy

Editing ties everything together. In Reels & short video creation, fast-paced editing keeps viewers glued. Here’s how to edit like a pro:

  • Use Quick Cuts: Keep clips short (1-3 seconds) for a fast, engaging pace.
  • Add Text Overlays: Include captions or keywords to grab attention, especially since many watch without sound.
  • Apply Transitions: Use simple zooms or swipes to move between scenes smoothly.
  • Time to Music: Sync cuts to the beat of the music for a polished feel.

Pro Tip: Watch viral Reels or Shorts to see how creators time their edits to music.


Step-by-Step Guide to Reels & Short Video Creation

Ready to make your first short video? Follow these easy steps to create content for Instagram Reels, YouTube Shorts, or promotional snippets.

Step 1: Plan Your Video

A good plan saves time and makes your video better. Ask yourself:

  • What’s the Purpose? Are you entertaining, teaching, or selling something?
  • Who’s Watching? Teens on TikTok love trends, while brands need professional promos.
  • What’s the Story? Sum it up in one sentence, like: “A quick hack to organize your desk.”

Sketch a simple storyboard or write a shot list. Note key visuals, audio, and timing.

Step 2: Shoot Your Footage

You don’t need fancy gear to start. Here’s how to shoot for Reels & short video creation:

  • Use a Smartphone: iPhones or Androids shoot great vertical video (1080×1920).
  • Stabilize Your Shot: Use a tripod or hold your phone steady to avoid shaky footage.
  • Film Extra Clips: Record B-roll (extra footage) to give yourself editing options.
  • Capture Variety: Shoot different angles or zoom levels for dynamic edits.

Pro Tip: Film in 4K if possible for sharper quality, even if you export in 1080p.

Step 3: Pick Your Audio

Audio makes or breaks short videos. Here’s how to choose:

  • Trending Music: Browse Instagram or TikTok’s audio library for popular tracks.
  • Voiceovers: Record with a clear microphone (even your phone’s mic works in a quiet room).
  • Sound Effects: Add fun effects from apps like CapCut or free libraries like Freesound.org.

Pro Tip: Save favorite tracks in the app to reuse them for future videos.

Step 4: Edit Your Video

Use editing apps like CapCut (free), Adobe Premiere Rush, or InShot. Here’s how to edit for Reels & short video creation:

  • Import Clips: Load your footage into the app and arrange it on the timeline.
  • Trim and Cut: Shorten clips to keep the video under 60 seconds (15-30 seconds for TikTok).
  • Add Text: Use bold, readable fonts for captions or calls-to-action (e.g., “Follow for more!”).
  • Sync to Audio: Match cuts to music beats or voiceover cues for a smooth flow.
  • Apply Effects: Add filters or effects sparingly to enhance, not distract.

Pro Tip: Save your project often to avoid losing your work.

Step 5: Finalize and Post

Polish your video and get it ready for the world:

  • Check Pacing: Watch the video to ensure it feels fast and engaging.
  • Add Captions: Include text for viewers watching on mute (common on social media).
  • Export Settings: Use H.264 format with 1080×1920 resolution for Reels and Shorts.
  • Post Strategically: Add hashtags (e.g., #Reels or #Shorts) and post during peak audience times.

Pro Tip: Test your video on your phone to ensure text and visuals look clear.


Reels & Short Video Creation for Different Platforms

Each platform has its own vibe. Here’s how to tailor your videos:

1. Instagram Reels

  • Length: 15-90 seconds.
  • Visuals: Bright, colorful, and eye-catching with text overlays.
  • Audio: Use trending Reels audio for better algorithm reach.
  • Pacing: Super fast with quick cuts to keep viewers scrolling.

2. YouTube Shorts

  • Length: Up to 60 seconds.
  • Visuals: Clear, vertical shots with bold thumbnails.
  • Audio: Mix trending music with voiceovers for tutorials or vlogs.
  • Pacing: Fast but slightly slower than Reels for storytelling.

3. Promotional Snippets

  • Length: 15-30 seconds.
  • Visuals: Clean, branded visuals with logos or product shots.
  • Audio: Upbeat music or professional voiceovers.
  • Pacing: Quick but polished, with a clear call-to-action.

Common Reels & Short Video Creation Mistakes to Avoid

Steer clear of these beginner mistakes:

  • No Hook: If the first 3 seconds are boring, viewers will scroll past.
  • Bad Audio: Muffled sound or overly loud music kills engagement.
  • Too Long: Videos over 60 seconds lose attention on short-form platforms.
  • Ignoring Trends: Missing out on viral sounds or hashtags limits reach.

Tools for Reels & Short Video Creation

You don’t need pro gear to make great short videos. Try these:

  • Cameras: Use your smartphone or a budget camera like the DJI Osmo Pocket.
  • Editing Apps: Free options like CapCut, InShot, or VN Video Editor; pro tools like Adobe Premiere Rush.
  • Audio Tools: Record voiceovers with a phone or a budget mic like the Boya BY-M1.
  • Stock Resources: Get free footage and music from Pexels, Pixabay, or Instagram’s audio library.

Learning More About Reels & Short Video Creation

Level up your skills with these resources:

  • YouTube Channels: Creators like Sara Dietschy or Think Media share short-form tips.
  • Online Courses: Skillshare and Udemy offer classes on Reels and Shorts editing.
  • Social Media: Follow creators on Instagram or TikTok to spot trends.
  • Practice: Make one short video a week to test new ideas.

Why Reels & Short Video Creation Rocks in 2025

As of July 2025, short-form video is still king. Platforms like Instagram and YouTube prioritize Reels and Shorts, giving creators huge reach. New AI tools, like auto-captioning in CapCut or Adobe’s auto-reframe, make Reels & short video creation faster and easier, even for beginners. By jumping on trends and keeping your content snappy, you can grow your audience like never before.


Conclusion

Reels & short video creation is your ticket to making fun, engaging content that grabs attention. By combining bold visuals, catchy audio, and fast-paced editing, you can create videos that shine on Instagram Reels, YouTube Shorts, or as promotional snippets. Start with a simple plan, use free tools, and experiment with trends. With these tips, you’ll be crafting viral short videos in no time.

Ready to go viral? Grab your phone, pick a trending sound, and start creating! To learn more about graphic designing practically join our institute YourPaathshaala in raipur or contact us at 8305209520 for more information.
Visual Storytelling: Create Engaging Videos with Visuals, Audio, and Pacing - Graphic Designing Classes in Raipur.

Visual Storytelling: Create Engaging Videos with Visuals, Audio, and Pacing

Visual Storytelling: Create Engaging Videos with Visuals, Audio, and Pacing - Graphic Designing Classes in Raipur.

Videos have the power to captivate, inspire, and connect with audiences like nothing else. Whether you’re creating a short TikTok clip, a YouTube vlog, or a professional ad, visual storytelling is the key to making your content unforgettable. By blending compelling visuals, impactful audio, and perfect pacing, you can craft stories that grab attention and leave a lasting impression. This beginner-friendly guide breaks down visual storytelling into simple, actionable steps. From choosing the right shots to syncing music and timing your edits, you’ll learn how to create engaging videos for any platform. Let’s dive in and unlock the art of visual storytelling!


What Is Visual Storytelling?

Visual storytelling is the art of using images, sounds, and timing to tell a story that grabs your audience’s attention. Think of it as painting a picture with video clips, music, and rhythm to make people feel something—whether it’s excitement, joy, or curiosity. Whether you’re making a TikTok, a YouTube vlog, or a short film, visual storytelling helps your video connect with viewers on any platform.

This guide breaks down visual storytelling into simple steps. You’ll learn how to mix visuals, audio, and pacing to create videos that people can’t stop watching. Let’s get started!


Why Visual Storytelling Matters

Great visual storytelling makes your videos memorable. Here’s why it’s so powerful:

  • Grabs Attention: Strong visuals and sound hook viewers in seconds.
  • Creates Emotion: The right music or image can make people laugh, cry, or feel inspired.
  • Works Everywhere: From Instagram Reels to corporate ads, visual storytelling fits any platform.
  • Builds Connection: Stories help viewers relate to your message or brand.
  • Boosts Engagement: Well-told stories keep audiences watching and sharing.

Whether you’re a beginner or a pro, mastering visual storytelling can take your videos to the next level.


The Building Blocks of Visual Storytelling

To create engaging videos, you need to combine three key elements: visuals, audio, and pacing. Let’s explore each one in a way that’s easy to understand.

1. Visuals: The Heart of Your Story

Visuals are what people see—your video clips, images, or animations. They set the tone and bring your story to life. Here’s how to make your visuals pop:

  • Choose the Right Shots: Use wide shots to show the setting, close-ups for emotions, and medium shots for action. For example, a wide shot of a beach sets the scene, while a close-up of a smile shows feeling.
  • Keep It Clear: Make sure your visuals are sharp and well-lit. Avoid shaky footage unless it’s intentional for a gritty vibe.
  • Use Colors Wisely: Colors set the mood. Warm colors (red, orange) feel cozy, while cool colors (blue, green) feel calm.
  • Add Text or Graphics: Simple text overlays or icons can highlight key points, like a product name or a call-to-action.

Pro Tip: Watch your favorite movie or ad and notice how they use visuals to tell the story. Copy what works!

2. Audio: The Soul of Your Video

Audio is just as important as visuals. It’s the music, voiceovers, and sound effects that make your story feel alive. Here’s how to use audio in visual storytelling:

  • Pick the Right Music: Choose music that matches your video’s mood. Upbeat tracks work for fun vlogs, while soft piano fits emotional stories.
  • Use Voiceovers: A clear voiceover can explain your story or add personality. Speak naturally, like you’re talking to a friend.
  • Add Sound Effects: Subtle sounds, like footsteps or a door creak, make your video feel real.
  • Balance Audio Levels: Ensure music doesn’t drown out voices. Use editing software to adjust volumes so everything sounds clear.

Pro Tip: Free music libraries like YouTube Audio Library or Epidemic Sound offer great tracks for beginners.

3. Pacing: The Rhythm of Your Story

Pacing is how fast or slow your video feels. It’s about timing your visuals and audio to keep viewers hooked. Here’s how to nail pacing in visual storytelling:

  • Start Strong: Grab attention in the first 3-5 seconds with a bold visual or sound.
  • Vary the Speed: Mix fast cuts for excitement (like in action scenes) with slower moments for emotion (like a heartfelt speech).
  • Keep It Tight: Avoid dragging scenes. If a clip feels boring, trim it down.
  • Use Pauses: A brief pause before a big reveal builds suspense.

Pro Tip: Watch your video with fresh eyes. If you feel bored, your audience will too—speed it up!


Step-by-Step Guide to Visual Storytelling

Now that you know the building blocks, let’s walk through how to create a video using visual storytelling. This process is simple and works for any platform.

Step 1: Plan Your Story

Every great video starts with a plan. Ask yourself:

  • What’s the Goal? Are you entertaining, educating, or selling something?
  • Who’s the Audience? A TikTok teen wants fast, fun content, while a corporate client prefers polished and professional.
  • What’s the Story? Sum it up in one sentence. For example: “A runner overcomes challenges to win a race.”

Write a quick script or storyboard. Sketch out key scenes and note visuals, audio, and pacing ideas.

Step 2: Gather Your Visuals

Collect the visuals you’ll need:

  • Shoot Footage: Use a smartphone or camera for clips. Record extra B-roll (background footage) for flexibility.
  • Find Stock Footage: Sites like Pexels or Pixabay offer free stock videos if you don’t have your own.
  • Create Graphics: Use tools like Canva or Adobe Express to design simple animations or text overlays.

Pro Tip: Always shoot more footage than you think you need. It’s easier to cut than to reshoot.

Step 3: Choose Your Audio

Pick audio that supports your story:

  • Music: Find royalty-free tracks that match your video’s vibe. For example, use energetic pop for a travel vlog.
  • Voiceovers: Record with a clear microphone in a quiet space. Practice reading your script to sound natural.
  • Sound Effects: Add small sounds (e.g., a crowd cheering) to make scenes feel immersive.

Pro Tip: Test audio with headphones to catch any issues before editing.

Step 4: Edit Your Video

Use editing software like Adobe Premiere Pro, DaVinci Resolve, or free options like iMovie or CapCut. Here’s how to edit for visual storytelling:

  • Arrange Clips: Place your visuals on the timeline in the order of your story.
  • Add Transitions: Use simple cuts or fades to move between scenes. Avoid overusing flashy transitions.
  • Sync Audio: Line up music and sound effects with your visuals. For example, time a beat drop with a big reveal.
  • Adjust Pacing: Trim clips to keep the video moving. Aim for a length that suits your platform (e.g., 15-60 seconds for TikTok, 5-10 minutes for YouTube).

Step 5: Polish and Export

Make your video shine with final touches:

  • Color Grading: Adjust colors to set the mood. For example, make a sunset scene warmer with orange tones.
  • Text Overlays: Add captions or titles for clarity, especially for social media where viewers watch without sound.
  • Export Settings: Choose H.264 format for web platforms. Use presets like “YouTube 1080p” for easy exporting.

Pro Tip: Watch your video on different devices (phone, laptop) to ensure it looks and sounds great everywhere.


Visual Storytelling Tips for Different Platforms

Each platform has unique needs for visual storytelling. Here’s how to adapt your video:

1. YouTube

  • Length: 5-15 minutes for tutorials or vlogs.
  • Visuals: Use clear, high-quality footage with engaging thumbnails.
  • Pacing: Start with a hook in the first 10 seconds to keep viewers watching.
  • Audio: Include a voiceover or music to guide the story.

2. TikTok and Instagram Reels

  • Length: 15-60 seconds.
  • Visuals: Bold, colorful clips with quick cuts to grab attention.
  • Pacing: Fast and energetic to match the platform’s vibe.
  • Audio: Use trending songs or sound effects for viral potential.

3. Corporate Videos

  • Length: 1-3 minutes for ads or promos.
  • Visuals: Clean, professional shots with branded colors and logos.
  • Pacing: Steady and polished, with clear transitions.
  • Audio: Use calm music and a professional voiceover.

Common Visual Storytelling Mistakes to Avoid

Here are some pitfalls to watch out for:

  • No Clear Story: If your video feels random, viewers will lose interest. Always have a beginning, middle, and end.
  • Poor Audio Quality: Muffled sound or loud music ruins the experience. Test audio carefully.
  • Slow Pacing: Long, boring scenes make viewers click away. Keep it snappy.
  • Ignoring the Platform: A 10-minute video won’t work on TikTok. Tailor your content to the platform.

Tools for Visual Storytelling

You don’t need expensive gear to create great videos. Here are beginner-friendly tools:

  • Cameras: Use a smartphone (e.g., iPhone or Android) or a budget camera like the Canon G7X.
  • Editing Software: Try free tools like CapCut or iMovie, or pro options like Adobe Premiere Pro.
  • Audio Tools: Use a USB microphone (e.g., Blue Yeti) for clear voiceovers.
  • Stock Resources: Find free visuals and audio on Pexels, Pixabay, or YouTube Audio Library.

Learning More About Visual Storytelling

Want to improve your visual storytelling skills? Check these resources:

  • YouTube Channels: Watch creators like Peter McKinnon or Film Riot for practical tips.
  • Online Courses: Platforms like Skillshare or MasterClass offer storytelling classes.
  • Books: Read “The Visual Story” by Bruce Block for deeper insights.
  • Practice: Create short videos weekly to experiment with visuals, audio, and pacing.

Why Visual Storytelling Rocks in 2025

As of 2025, visual storytelling is more important than ever. With short-form content dominating platforms like TikTok and YouTube Shorts, creators need to hook viewers fast. New AI tools in editing software (like Adobe Premiere’s auto-reframe) make it easier to create polished videos, even for beginners. By mastering visual storytelling, you can stand out in a crowded digital space.


Conclusion

Visual storytelling is all about combining visuals, audio, and pacing to create videos that people love. Whether you’re making a quick TikTok or a polished YouTube video, the key is to plan your story, choose strong visuals and audio, and keep the pacing tight. Start small, experiment with free tools, and practice regularly. With these visual storytelling tips, you’ll be creating engaging content in no time.

Ready to tell your story? Grab your camera, pick a song, and start creating! To learn more about graphic designing practically join our institute YourPaathshaala in raipur or contact us at 8305209520 for more information.
Master After Effects Basics: A Comprehensive Guide for Beginners - Graphic Designing course in Raipur.

Master After Effects Basics: A Comprehensive Guide for Beginners

Master After Effects Basics: A Comprehensive Guide for Beginners - Graphic Designing course in Raipur.

Adobe After Effects is a powerhouse for motion graphics, visual effects, and animation, widely used in film, TV, and digital content creation. Whether you’re crafting dynamic intros for YouTube, animating logos, or adding cinematic effects, mastering After Effects basics opens up endless creative possibilities. This guide walks you through the essentials, from navigating the interface to creating your first animation. By the end, you’ll have the skills to start building professional-grade visuals with confidence.

Let’s dive into After Effects basics and unlock your creative potential!


Why Choose After Effects for Motion Graphics?

After Effects is the industry standard for motion graphics and visual effects, thanks to its robust features and seamless integration with Adobe Creative Cloud apps like Premiere Pro and Photoshop. Here’s why it’s a top choice:

  • Versatile Animation Tools: Create everything from simple text animations to complex 3D effects.
  • Extensive Effects Library: Access hundreds of built-in effects for creative flexibility.
  • Integration with Adobe Ecosystem: Sync projects with Premiere Pro or Photoshop for a streamlined workflow.
  • Community Resources: A wealth of tutorials and plugins makes learning After Effects basics accessible.
  • Industry Trust: Used by professionals in Hollywood, YouTube, and advertising.

Whether you’re a beginner or an aspiring pro, After Effects basics provide the foundation for stunning visuals.


Getting Started with After Effects Basics

1. Setting Up Your First Project

To begin with After Effects basics, you need to set up your project correctly:

  • Create a New Project: Open After Effects, select “New Project,” and name it. Choose a save location to stay organized.
  • Set Up a Composition: Click “New Composition” in the Project panel. Set resolution (e.g., 1920×1080 for HD), frame rate (24 or 30 fps is standard), and duration.
  • Import Assets: Drag and drop video clips, images, or audio files into the Project panel. Organize them into folders (e.g., “Footage” or “Graphics”).

Pro Tip: Keep your project organized by naming compositions clearly, like “Intro Animation” or “Logo Reveal.”

2. Understanding the After Effects Interface

The After Effects interface may seem complex, but it’s designed for efficiency. Key areas include:

  • Project Panel: Stores all imported assets like footage, images, and audio.
  • Composition Panel: Displays your active composition (the canvas where you create).
  • Timeline: Where you arrange layers and animate properties.
  • Tools Panel: Includes tools like the selection tool (V), text tool (T), and shape tool.
  • Effects & Presets Panel: Contains effects and animation presets for quick application.

Spend time exploring the interface to get comfortable with After Effects basics.


Essential After Effects Basics Techniques

1. Working with Layers

Layers are the building blocks of After Effects basics. Here’s how to use them:

  • Add Layers: Drag assets (e.g., video, images, or text) from the Project panel to the Timeline or Composition panel.
  • Layer Types: Use video layers, image layers, text layers, shape layers, or solid layers (created via Layer > New > Solid).
  • Organize Layers: Arrange layers in the Timeline to control their stacking order (top layers appear in front).

Pro Tip: Name layers descriptively (e.g., “Background” or “Title Text”) to avoid confusion.

2. Creating Basic Animations with Keyframes

Animation is at the heart of After Effects basics. Keyframes let you animate properties like position, scale, rotation, or opacity:

  • Select a Layer: Click a layer in the Timeline.
  • Access Transform Properties: Expand the layer to reveal properties like Position, Scale, or Opacity.
  • Add Keyframes: Click the stopwatch icon next to a property to enable keyframing. Move the playhead and adjust the property to create a new keyframe.
  • Smooth Animations: Use the “Easy Ease” option (right-click a keyframe > Keyframe Assistant > Easy Ease) for natural motion.

Example: To animate a logo moving across the screen, set a Position keyframe at the start, move the playhead, and set another keyframe at a new position.

3. Adding Text and Typography

Text animations are a core part of After Effects basics. To create and animate text:

  • Create Text: Select the Text tool (T) and click in the Composition panel to type.
  • Customize Text: Use the Character and Paragraph panels to adjust font, size, and alignment.
  • Animate Text: Apply animation presets from the Effects & Presets panel or use keyframes to animate properties like position or opacity.

Pro Tip: Explore Adobe Fonts for professional typography options.

4. Applying Effects

After Effects offers a vast library of effects to enhance your projects. To apply effects:

  • Select a Layer: Choose the layer you want to enhance.
  • Browse Effects: Go to the Effects & Presets panel and search for effects like Gaussian Blur, Glow, or CC Particle World.
  • Apply Effects: Drag the effect onto the layer or double-click to apply it.
  • Adjust Settings: Use the Effect Controls panel to tweak effect properties.

Advanced After Effects Basics Techniques

Once you’ve grasped the fundamentals, explore these advanced After Effects basics to elevate your projects:

1. Working with Shape Layers

Shape layers are versatile for creating graphics and animations:

  • Create Shapes: Use the Shape tool (Q) to draw rectangles, circles, or custom shapes.
  • Animate Shapes: Add keyframes to properties like Scale or Path to create morphing effects.
  • Add Effects: Apply effects like Trim Paths for dynamic line animations.

Shape layers are perfect for creating animated icons or backgrounds.

2. Using Motion Tracking

Motion tracking adds realism to your compositions by attaching elements to moving objects:

  • Track Motion: Go to Window > Tracker, select a layer, and click “Track Motion.”
  • Set Track Points: Place track points on high-contrast areas of your footage.
  • Apply Tracking Data: Attach text, graphics, or effects to the tracked motion.

Example: Add a name tag to a moving person in a video.

3. Compositing with Masks

Masks allow you to isolate parts of a layer:

  • Create a Mask: Select a layer and use the Pen or Shape tool to draw a mask.
  • Animate Masks: Add keyframes to the Mask Path property for dynamic reveals.
  • Adjust Mask Properties: Use Mask Expansion or Feather for smooth edges.

Masks are great for creating vignettes or revealing text.

4. Working with Expressions

Expressions are snippets of JavaScript that automate animations:

  • Add an Expression: Alt-click (Windows) or Option-click (Mac) the stopwatch of a property.
  • Write Code: Use simple expressions like wiggle(2, 50) to add random motion to a layer.
  • Learn Common Expressions: Explore resources like MotionScript.com for beginner-friendly examples.

Expressions save time when animating repetitive tasks.


Optimizing Your After Effects Workflow

Efficiency is crucial when mastering After Effects basics. Here are tips to streamline your process:

  • Use Precompositions: Group layers into a precomposition (Layer > Pre-compose) to keep your Timeline organized.
  • Leverage Presets: Save frequently used animations as presets in the Effects & Presets panel.
  • Keyboard Shortcuts: Learn shortcuts like T (Opacity), P (Position), or S (Scale) to speed up your workflow.
  • Preview Efficiently: Use RAM Preview (0 on the numeric keypad) to check animations smoothly.

Exporting Your After Effects Project

Once your project is complete, export it for sharing:

  • Render Your Composition: Select your composition and go to Composition > Add to Render Queue.
  • Choose a Format: Use H.264 for web-friendly videos (e.g., YouTube or Vimeo).
  • Adjust Settings: Select a preset like “YouTube 1080p” or customize output settings.
  • Use Adobe Media Encoder: Queue your render in Media Encoder for faster processing.

Pro Tip: Check your export settings in the Preview panel to ensure quality.


Common After Effects Mistakes to Avoid

Avoid these pitfalls when learning After Effects basics:

  • Cluttered Timelines: Too many layers can slow your workflow. Use precompositions to stay organized.
  • Overusing Effects: Subtle effects often look more professional than heavy-handed ones.
  • Ignoring Performance: Large projects can lag. Use proxies or lower preview resolution.
  • Not Saving Frequently: Auto-save (Edit > Preferences > Auto-Save) prevents data loss.

After Effects Resources and Learning Tools

To master After Effects basics, explore these resources:

  • Adobe Tutorials: Adobe’s website offers free beginner and advanced tutorials.
  • YouTube Channels: Channels like Video Copilot and Motion Array provide practical tips.
  • Online Courses: Platforms like Skillshare and LinkedIn Learning offer structured After Effects courses.
  • Plugins: Explore plugins like Element 3D or Trapcode Suite for advanced effects.

After Effects Basics for Different Projects

1. YouTube Intros and Outros

Create engaging intros with animated text and logos. Use shape layers and motion tracking to add flair. Keep intros short (5-10 seconds) to retain viewers.

2. Social Media Ads

For Instagram or TikTok ads, focus on bold visuals and quick animations. Use After Effects basics to create eye-catching text and transitions.

3. Film Visual Effects

Add cinematic effects like lens flares, particle effects, or color grading to enhance short films or music videos.


Why After Effects Shines in 2025

As of 2025, After Effects continues to evolve with AI-driven tools like auto-mask and enhanced motion tracking, making After Effects basics more accessible. Its integration with Adobe’s ecosystem and support for 4K/8K workflows keep it at the forefront of motion design.


Conclusion

Mastering After Effects basics opens the door to creating stunning motion graphics and animations. From keyframes to motion tracking, this guide covers the essential skills to get you started. Whether you’re animating a logo, enhancing a video, or building a cinematic sequence, After Effects offers the tools to bring your ideas to life. Start experimenting, explore online resources, and practice regularly to become an After Effects pro.

Ready to create your next animation? Open After Effects and let your creativity soar! To learn more about graphic designing practically join our institute YourPaathshaala in raipur or contact us at 8305209520 for more information.